- Introduction
- Getting Started
- Guides and Tutorials
- Introduction to Terra
- Introduction to Dockstore
- Understanding Cloud Costs
- Account Setup
- Overview of Account Setup
- Obtaining a Google ID
- Creating a Terra Account
- Billing Setup
- Overview of Billing Concepts
- Creating a Google Cloud Billing Account
- Accessing Data
- Discovering Data
- Requesting Data Access
- Data Access Controls
- Bringing Your Own Data
- Running Analysis Workflows
- Using Example Workspaces
- Running GATK in Terra
- Running Galaxy Workflows from Dockstore
- Running Interactive Analyses
- Running Jupyter Notebooks in AnVIL
- Running R / Bioconductor in AnVILL
- Running Galaxy in AnVIL
- MOOC
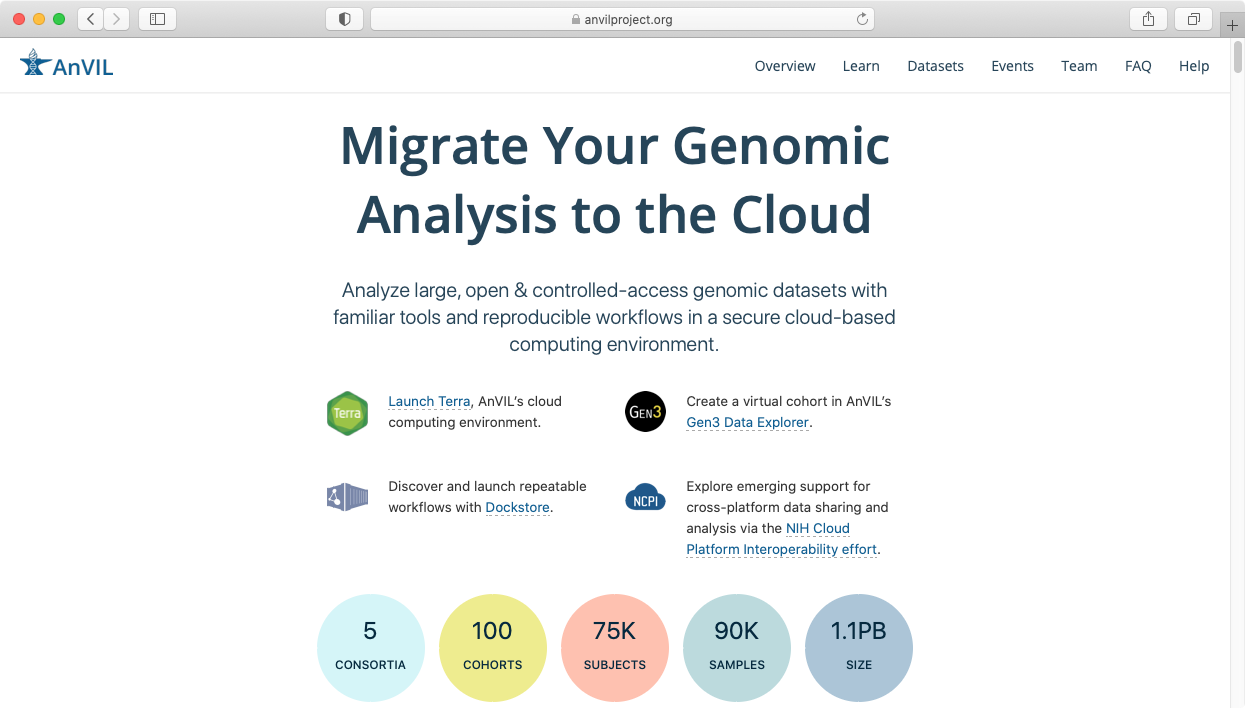
- What is AnVIL?
- Cloud Computing
- Cloud Costs
- Use Case: GATK
- Use Case: GWAS
- Use Case: eQTL
- Video Gallery
- Anvil
- Terra
- Dockstore
- Galaxy
- Seqr
- Workshop Archive
- Workshop Archive
- Reference
- GTEx v8 - Egress Instructions
- Cross Platform Data Access with GA4GH DRS in Terra
Galaxy Running in AnVIL / Terra
We are pleased to announce that Galaxy is now available within Terra, AnVIL's cloud compute environment.
Overview of Galaxy in the Cloud
Launching Galaxy in AnVIL
To access Galaxy use the new "Create a Cloud Environment for Galaxy" feature under Notebooks.
This will take you to the AnVIL branded version of Galaxy!
From the AnVIL branded version of Galaxy, users can browse files in their AnVIL/Terra Workspace and perform a variety of genomics research.
Step-by-Step Tutorial
The step-by-step tutorial below demonstrates how to compute quality metrics of unaligned reads, align the reads to a reference genome using bowtie2, plot a coverage histogram, call variants using FreeBayes, and then summarize the variant calls using bcftools.
I. Launching Galaxy
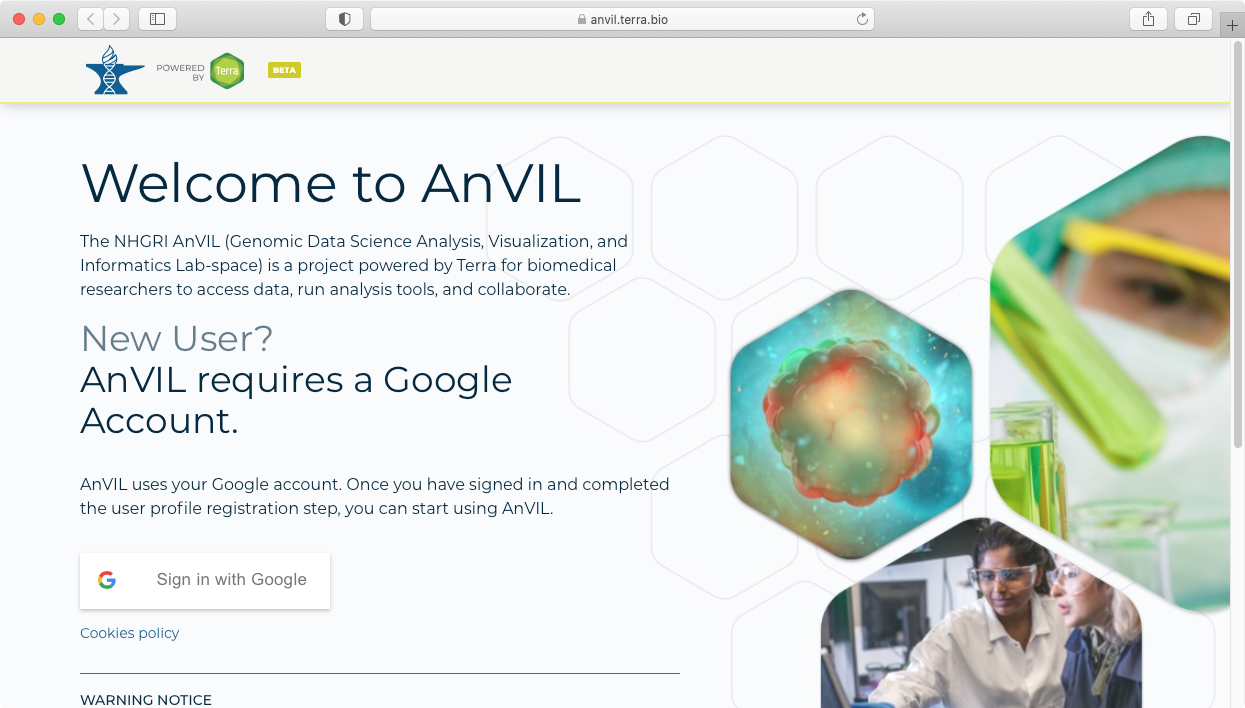
- To access it, visit the AnVIL portal and click on "Launch Terra".
- This will take you to the Terra sign in page, which allows you to sign in using your Google credentials.
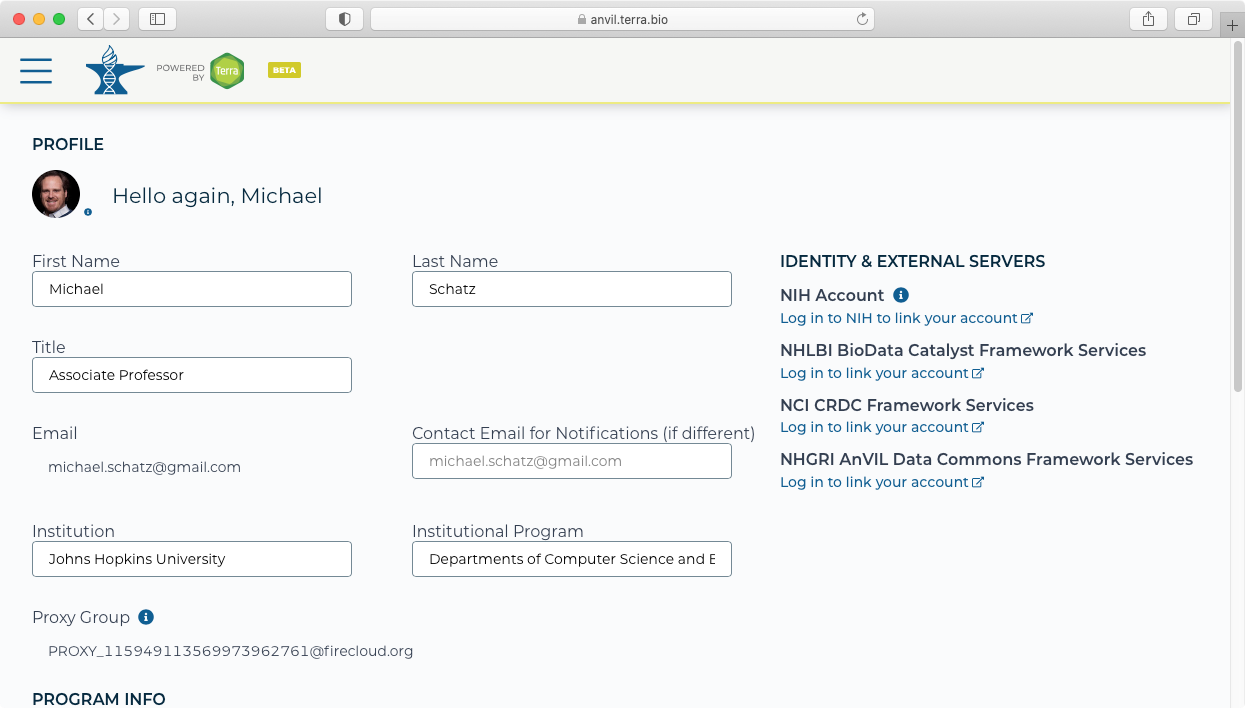
- If this is the first time you are using AnVIL, you should first link your AnVIL account to the NHGRI AnVIL Data Commons Framework Services from your AnVIL profile page (https://anvil.terra.bio/#profil). This is done using the bottom link on the right-hand side and signing in using your ERA commons identity.
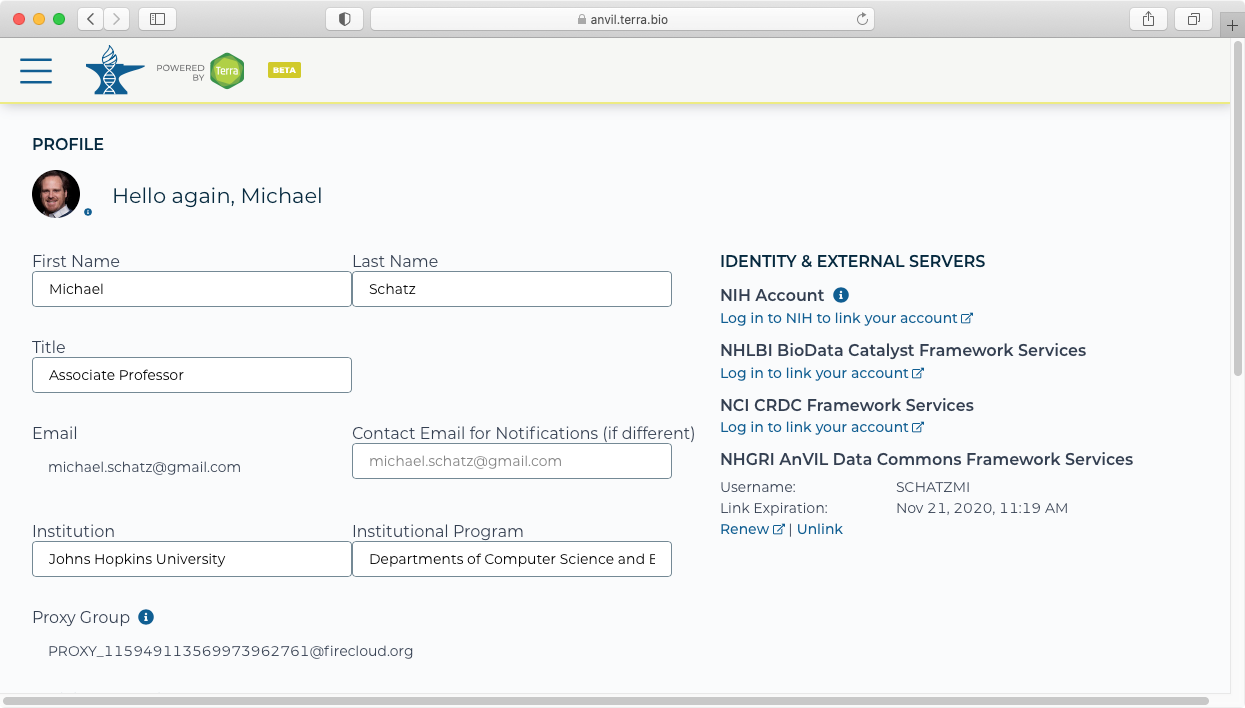
- After signing in, you should see that your account is now linked. You will need to renew your link every 30 days.
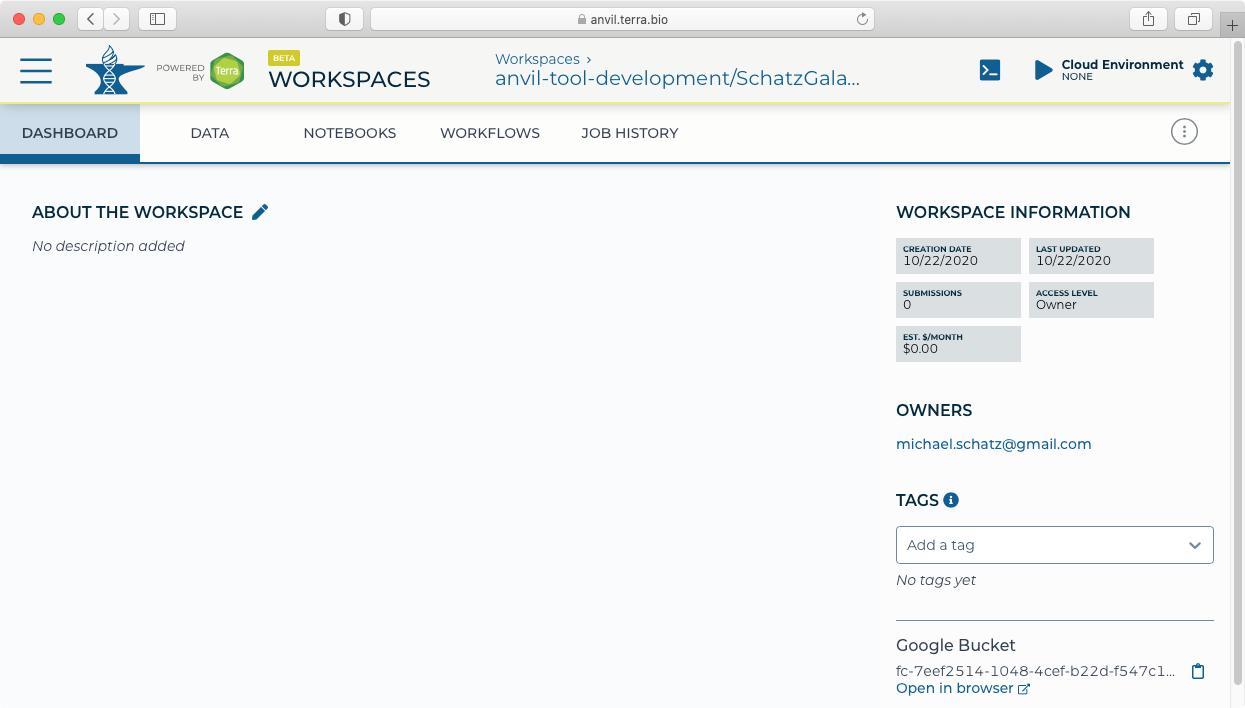
- Once your accounts are linked, return to the workspace list available at https://anvil.terra.bio/#workspaces.
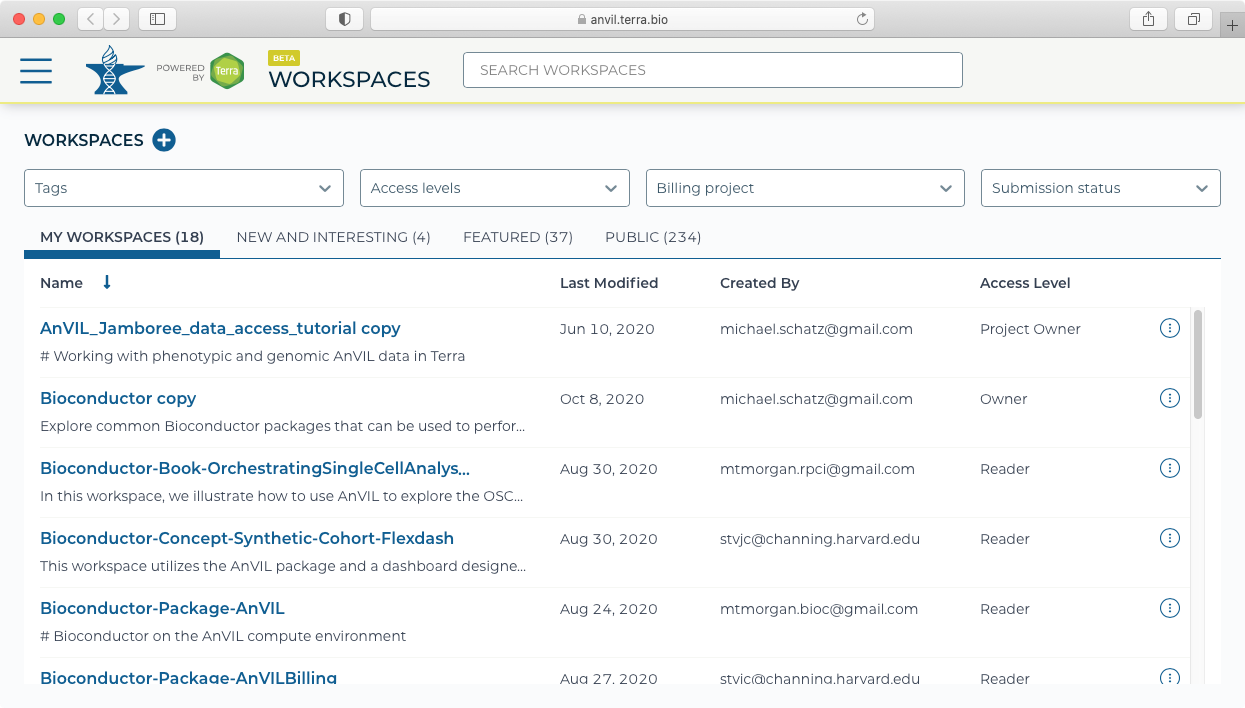
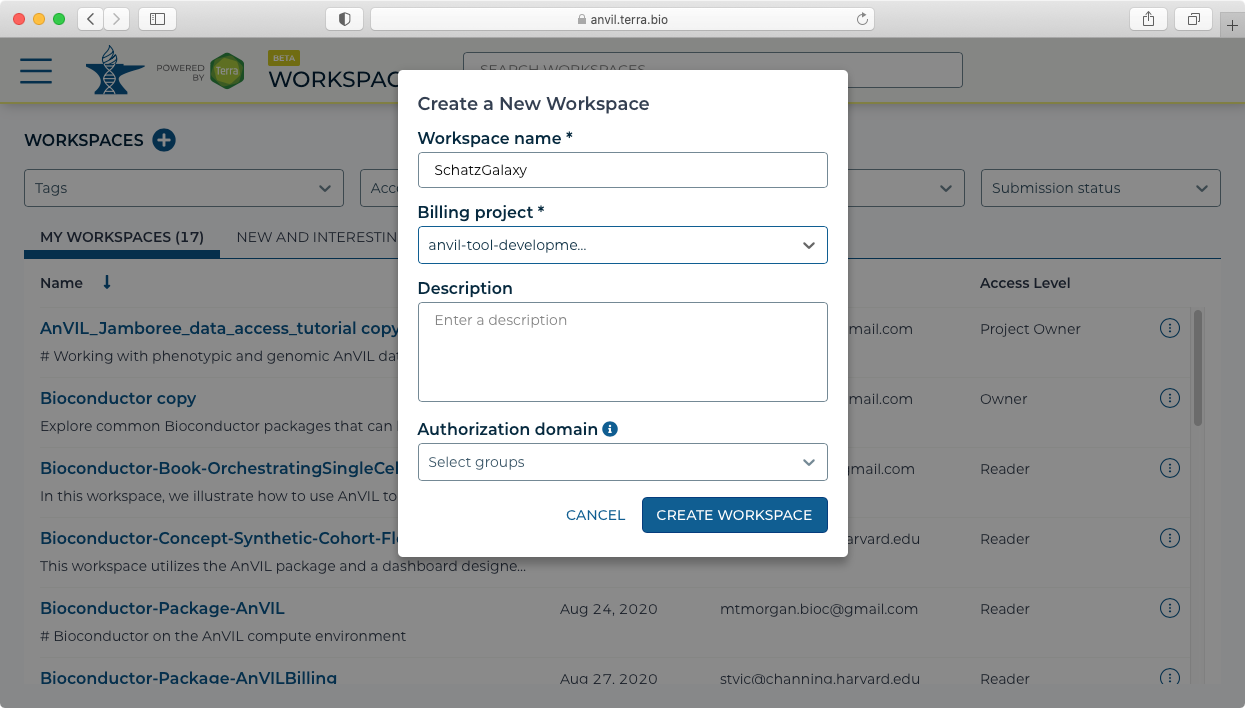
- Galaxy must be launched from a workspace. This can either be an existing workspace that has data already loaded, or could be from a new workspace. For this example, we will create a new workspace using the "Create New Workspace" dialog. Note you will also need to set up and select a Billing project to be associated with the Workspace.
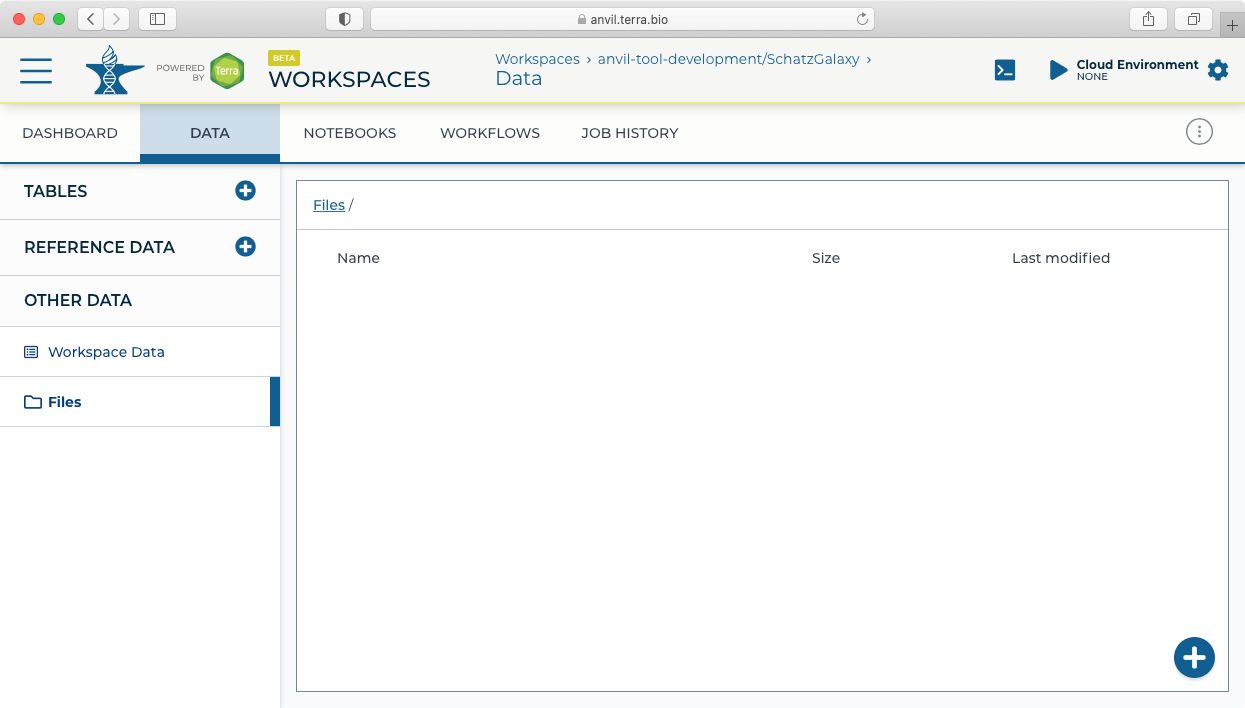
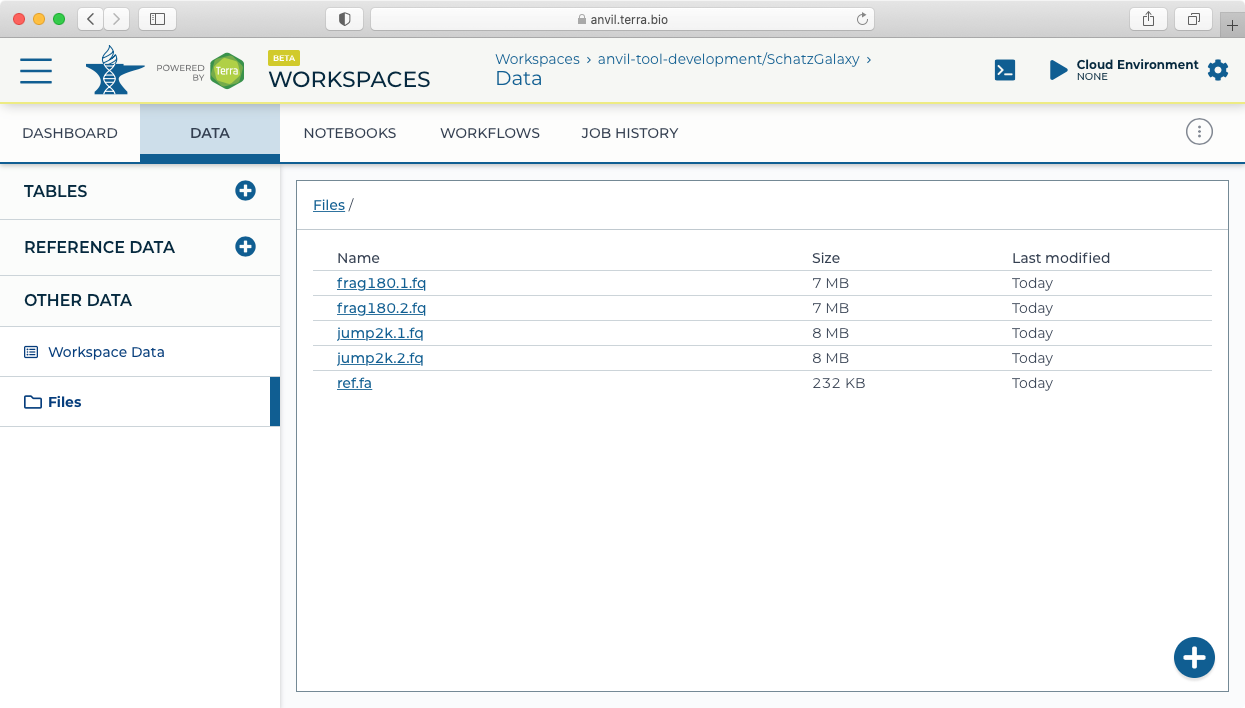
- For this example, we will load (simulated) microbial sequencing data available here: asm.tgz. After downloading the asm.tgz file, expand the archive and upload the data to the Terra workspace by dragging and dropping the files from your local computer (or using the + button) into the Files pane in the Data tab.
- Next click on the "Notebooks" tab to find the "Create a Cloud Environment for Galaxy" button.
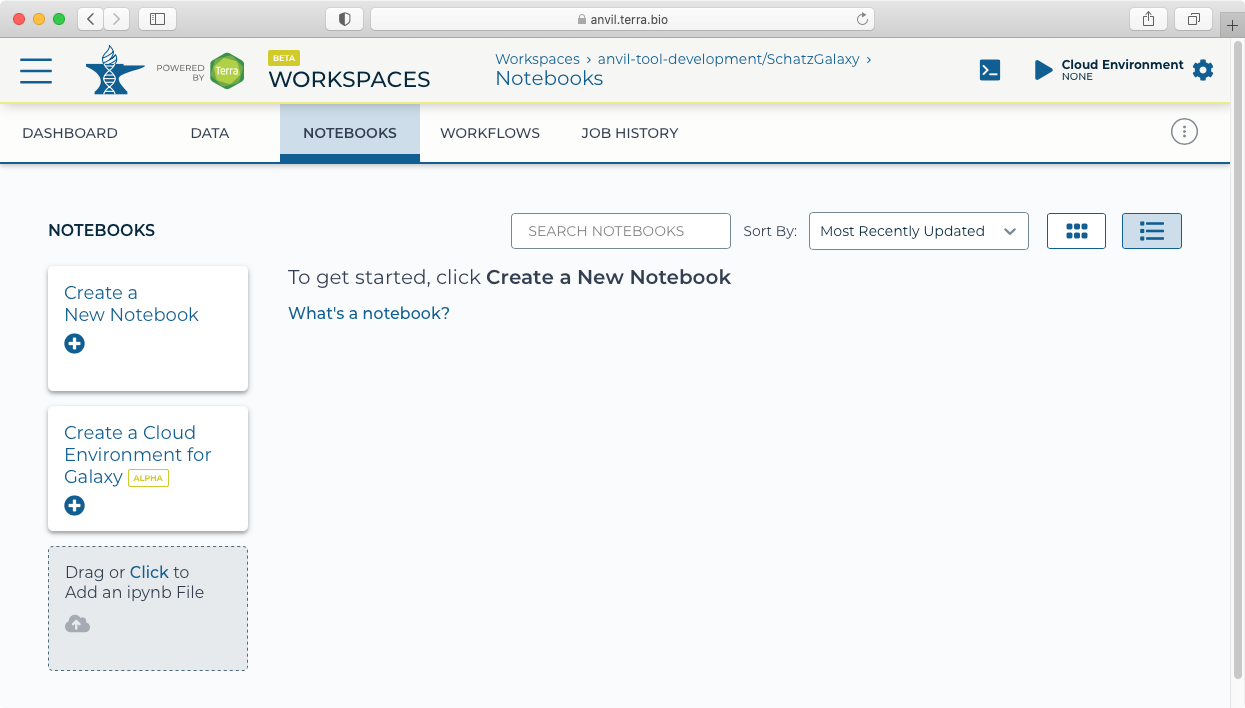
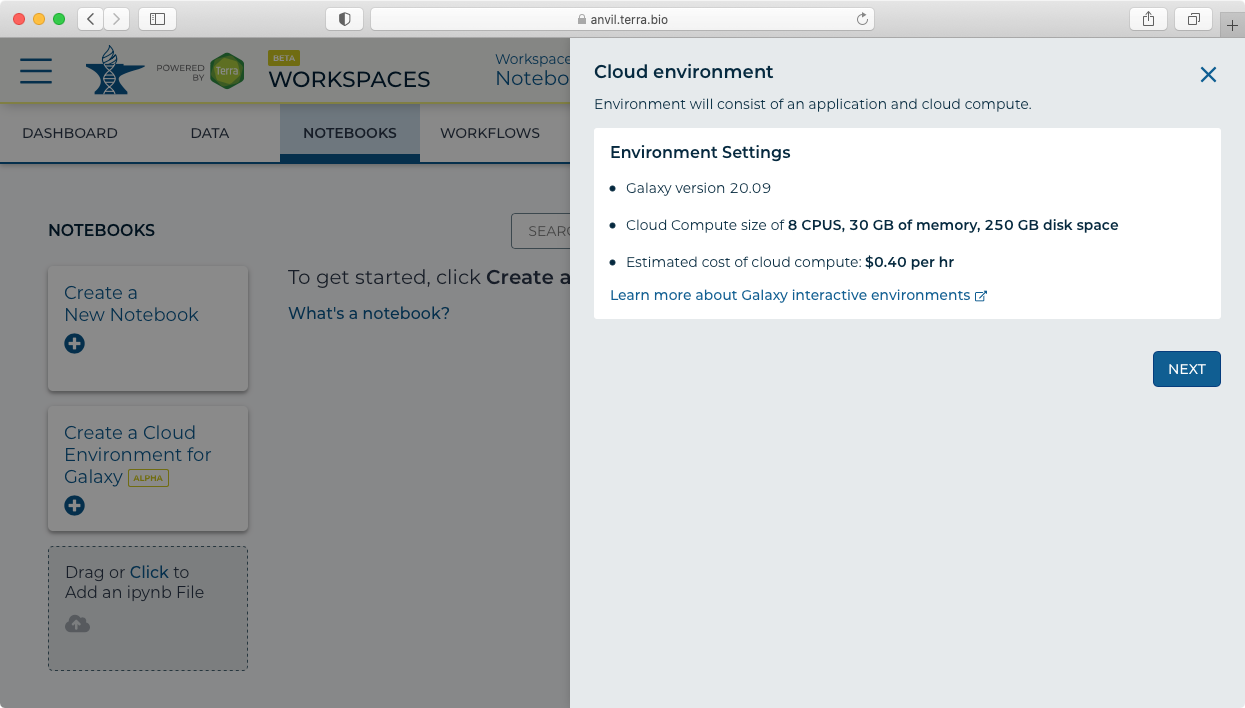
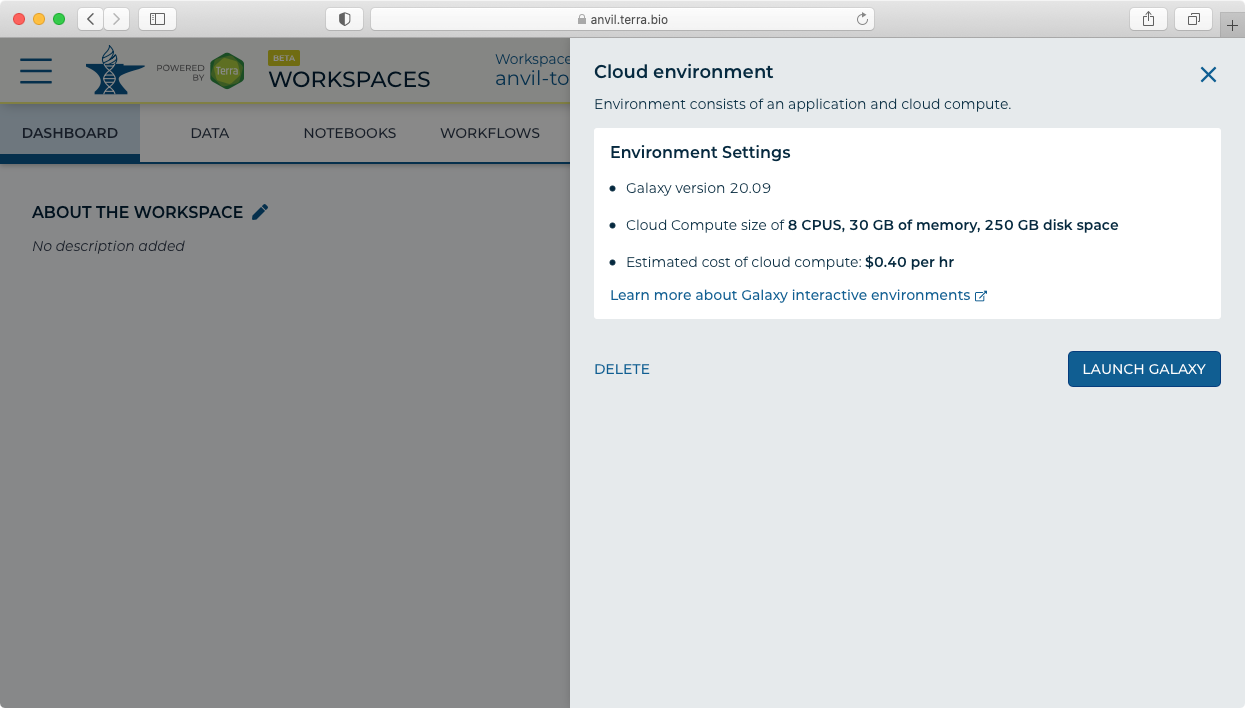
- Clicking on the "Create a Cloud Environment for Galaxy’ button brings up the "Cloud environment" launch panel.
- Clicking next then shows the "Create" panel.
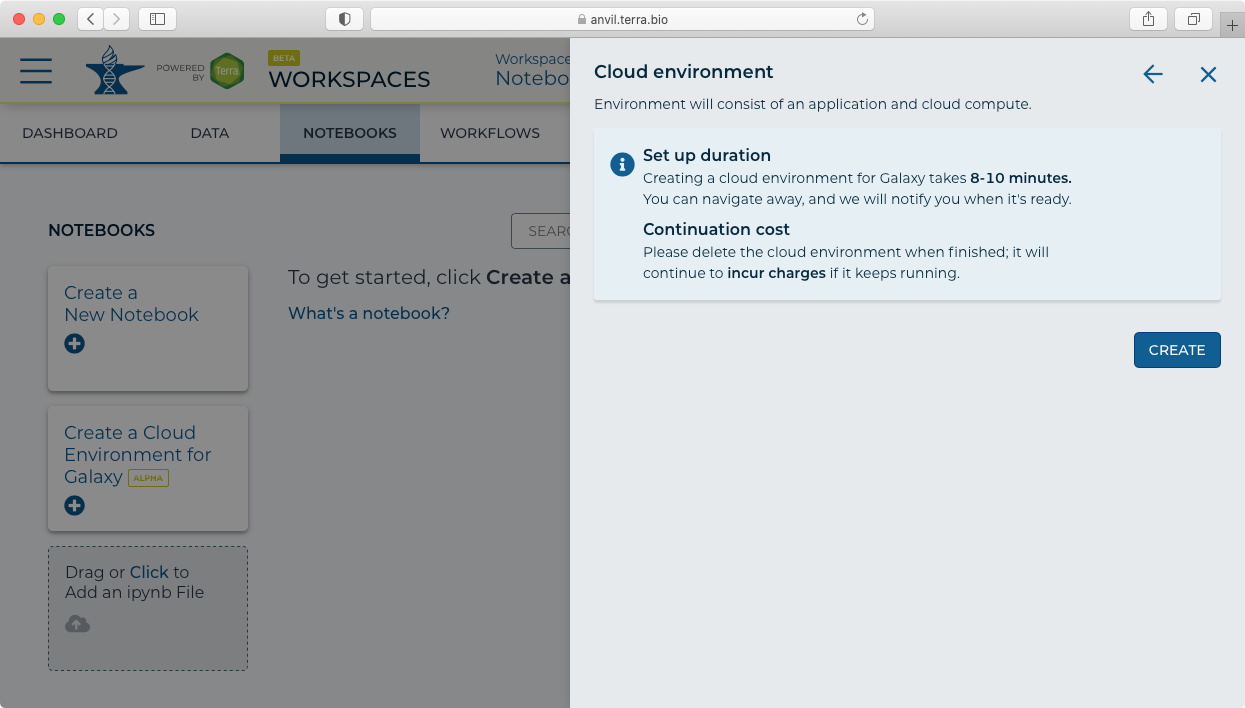
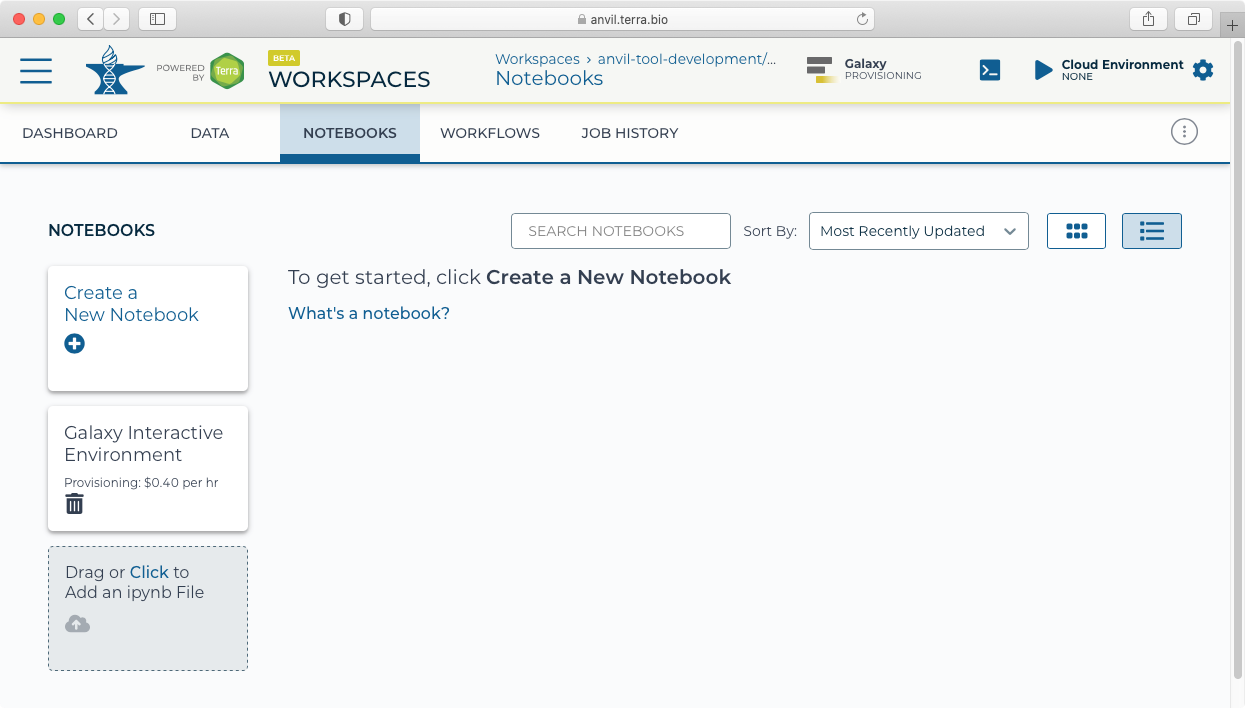
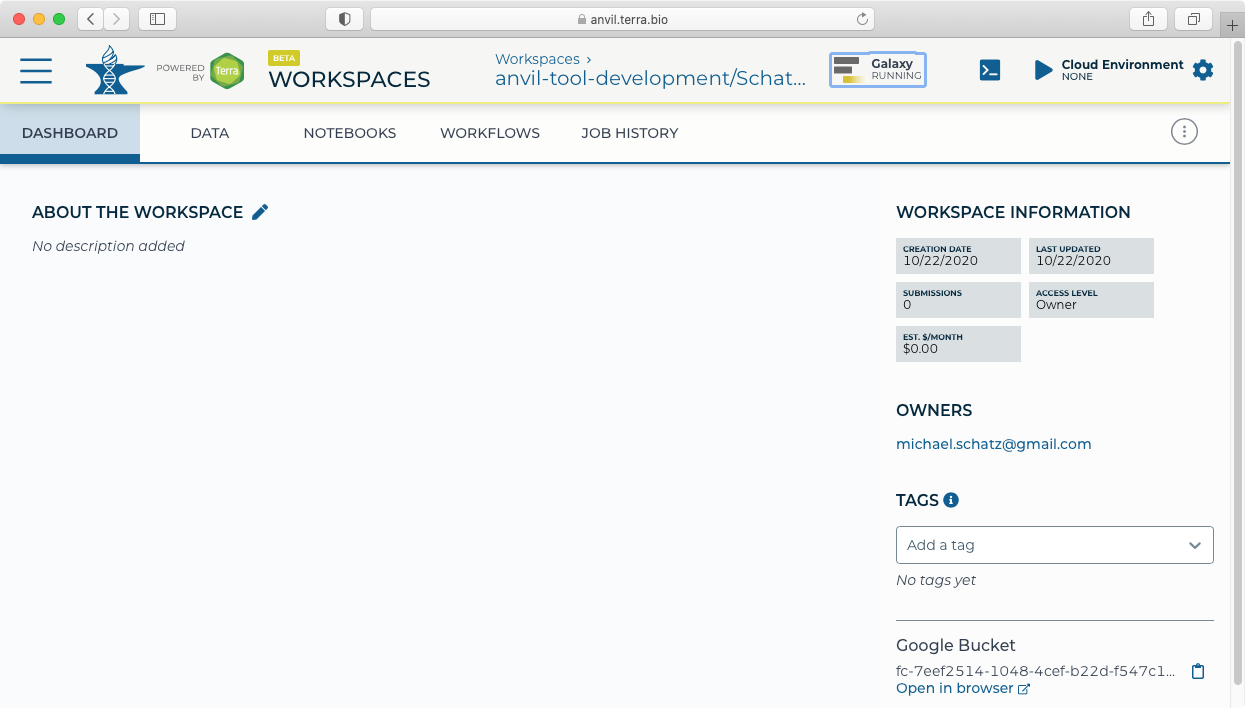
- After clicking "Create" you will see a new icon at the top showing "Galaxy Provisioning". It will take approximately 10 minutes for Galaxy to be fully provisioned and initialized.
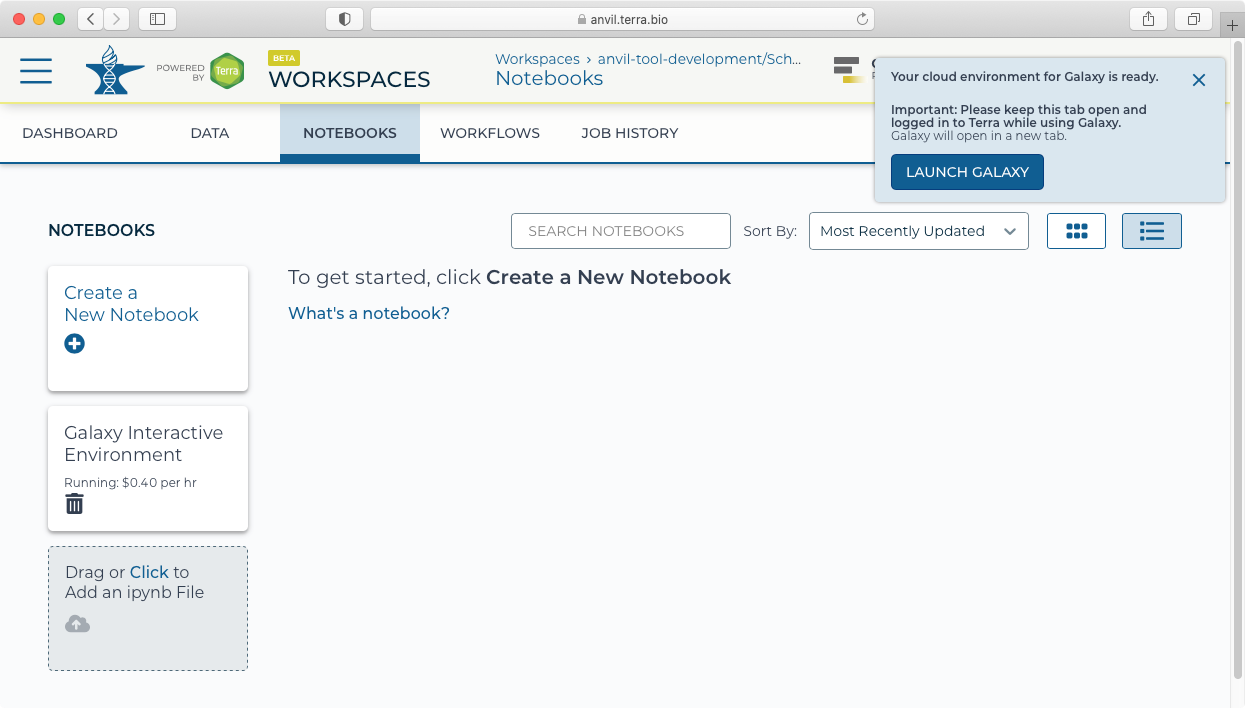
- After provisioning, you will be notified that you can now launch Galaxy.
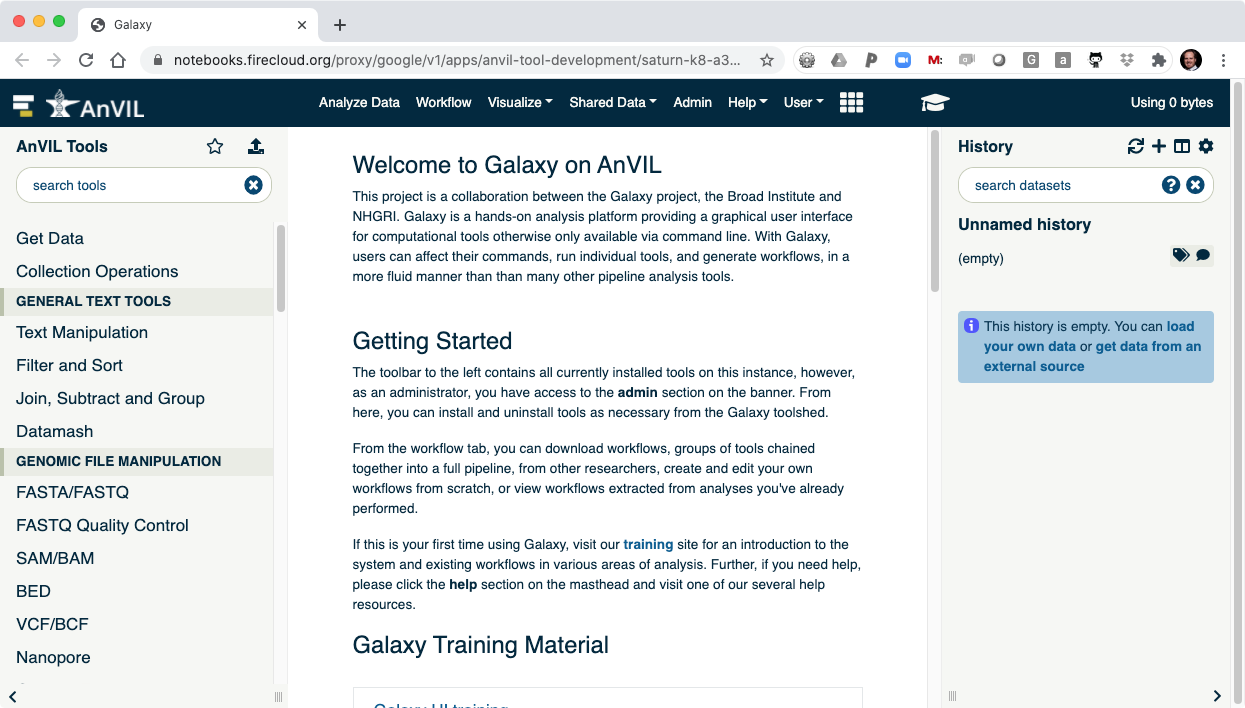
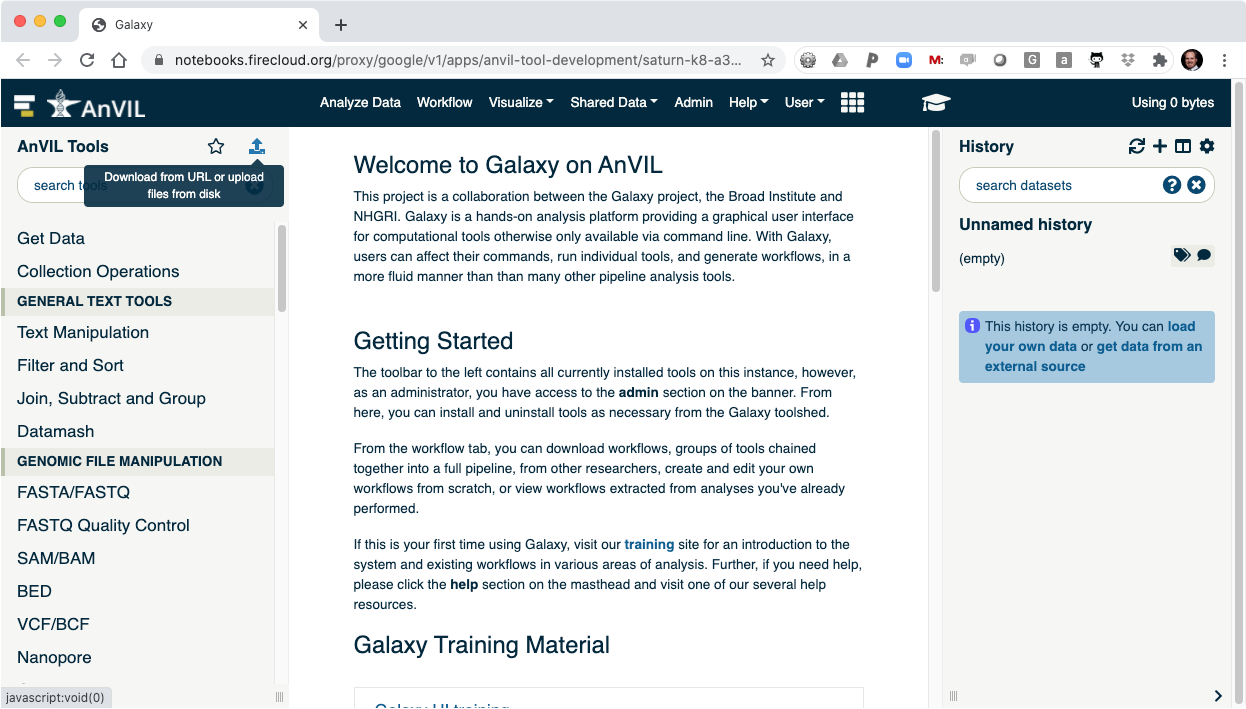
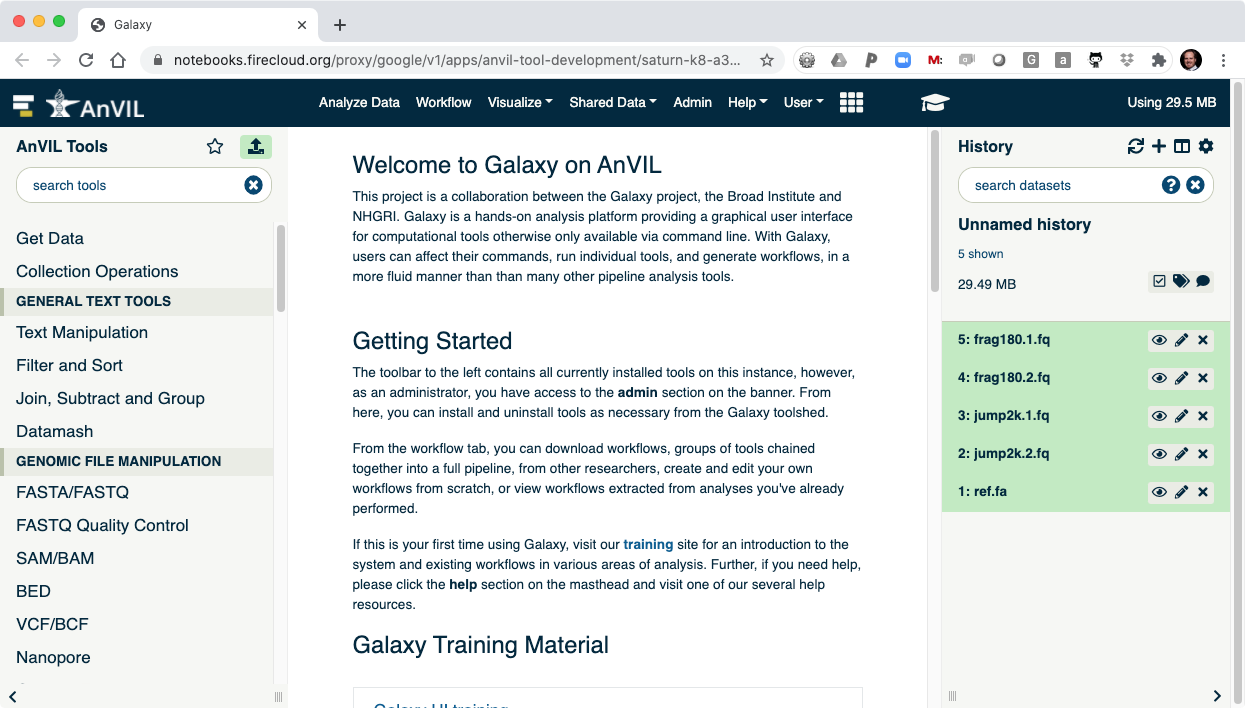
II. Welcome to Galaxy in AnVIL
- Clicking "Launch Galaxy" will take you to the Galaxy welcome screen.
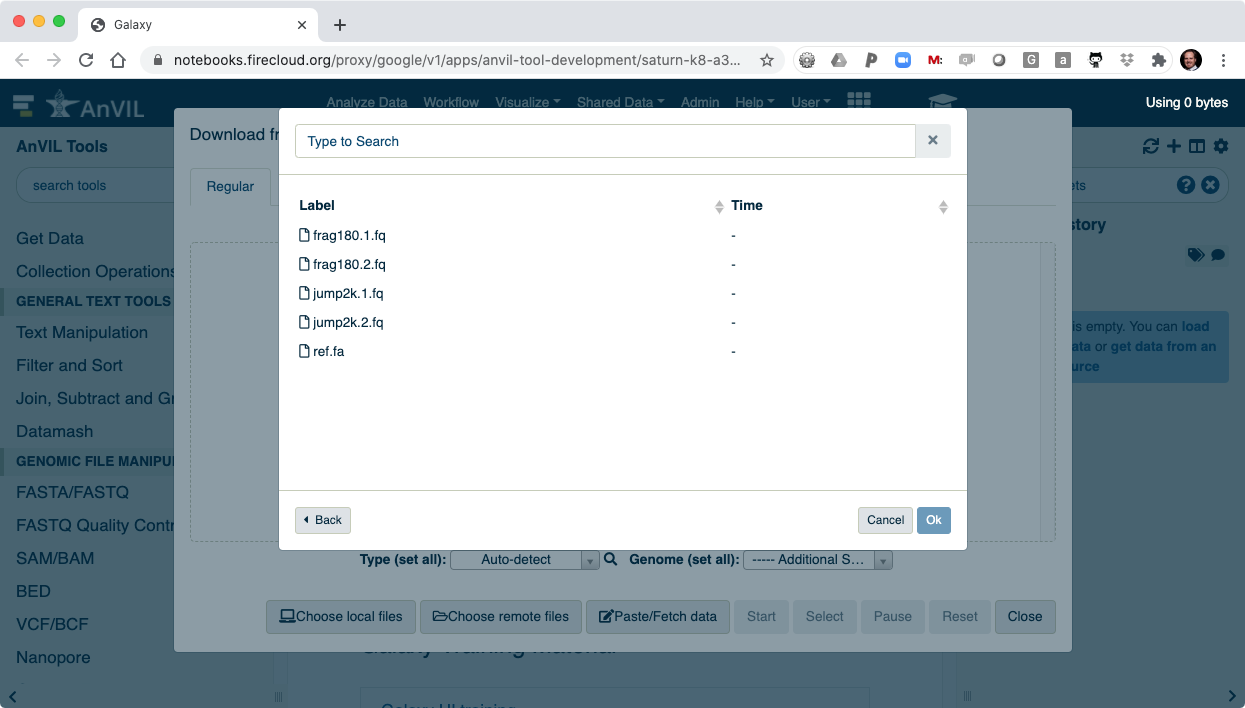
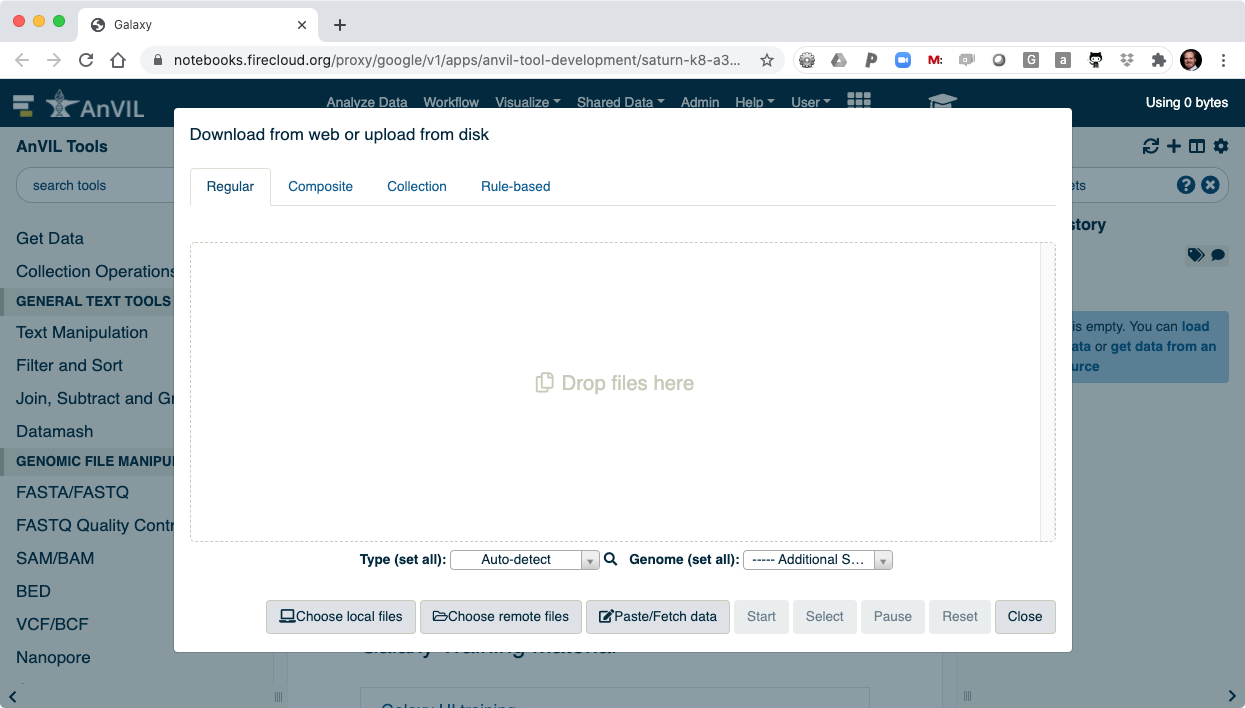
- Click on the data upload tool to load your data into Galaxy.
- This will display the data browser.
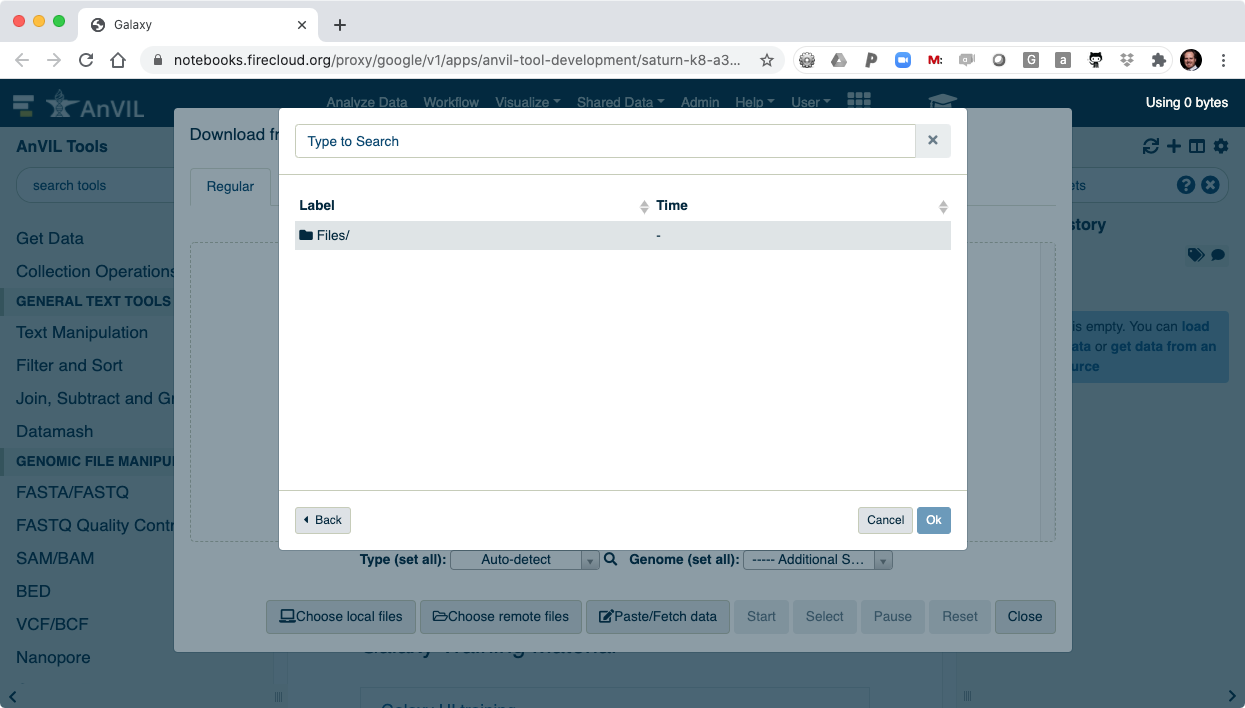
- Then click "Choose remote files" to access your AnVIL/Terra Workspace.
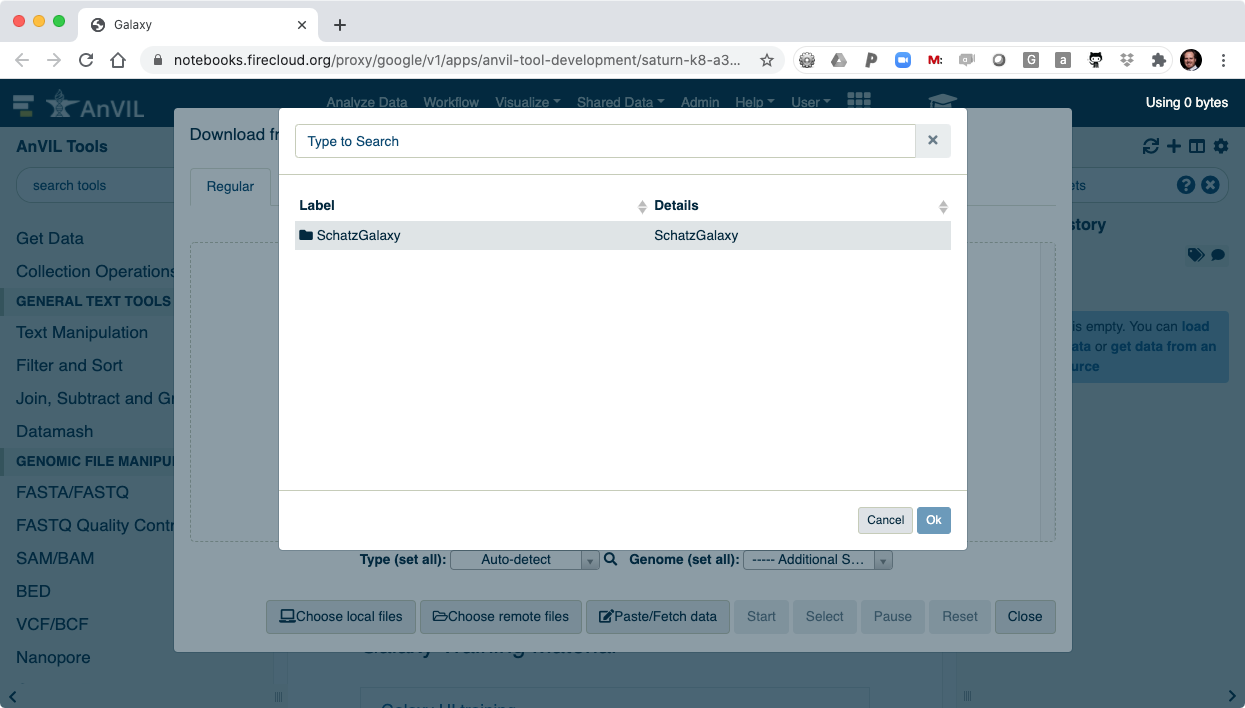
- Browse inside your workspace to "Other Data".
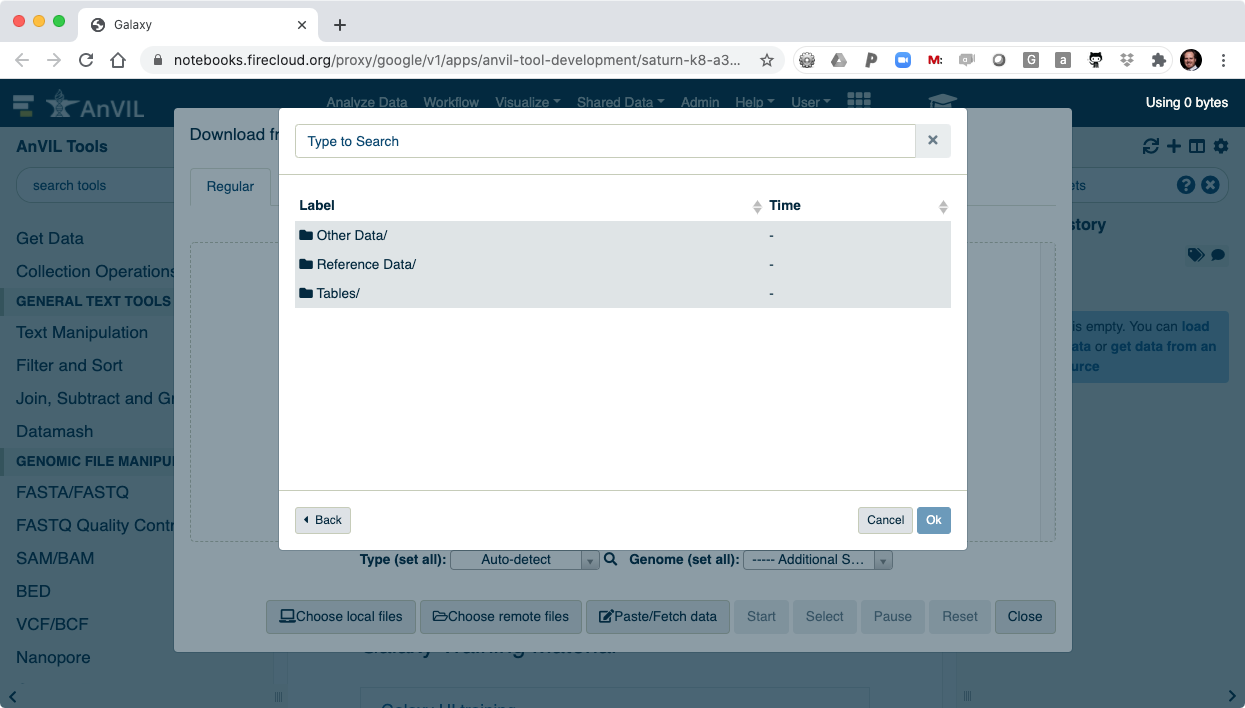
- And then "Files/".
- Here you will see all of the data you loaded into your AnVIL Workspace.
- Select all of the files to load into Galaxy.
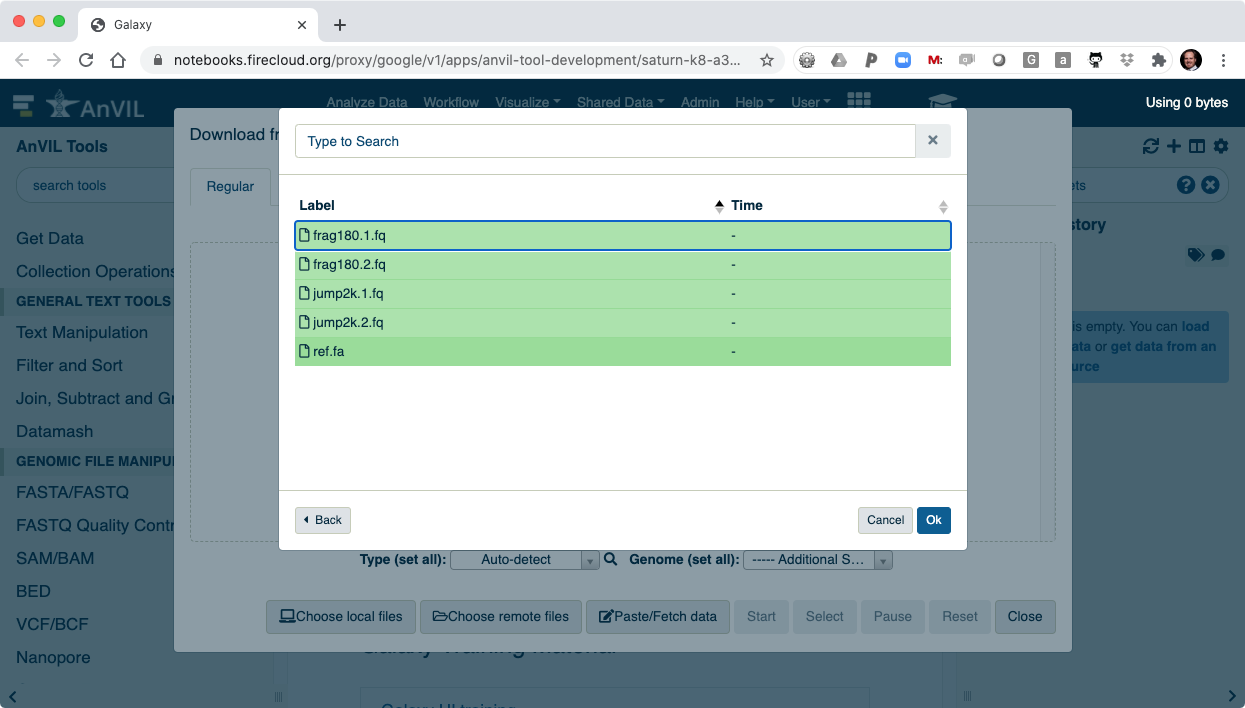
- Clicking "Ok" will finalize the selection.
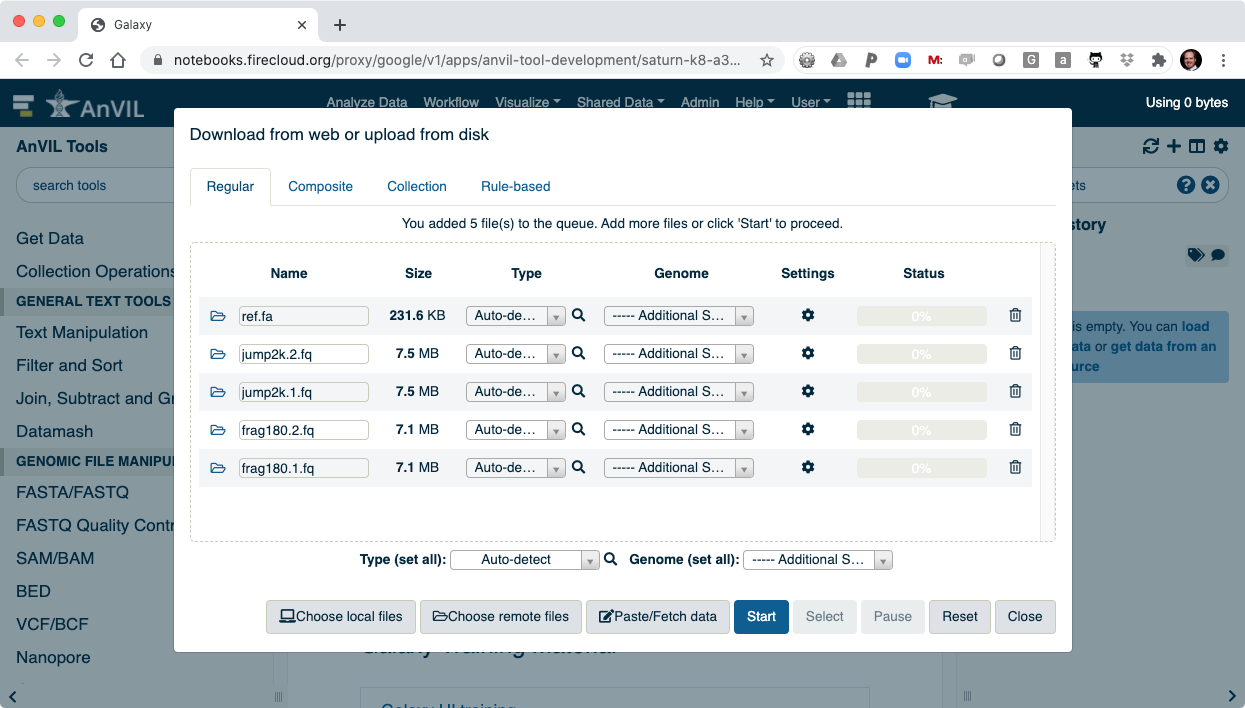
- After clicking "Start" the data will be transferred into Galaxy.
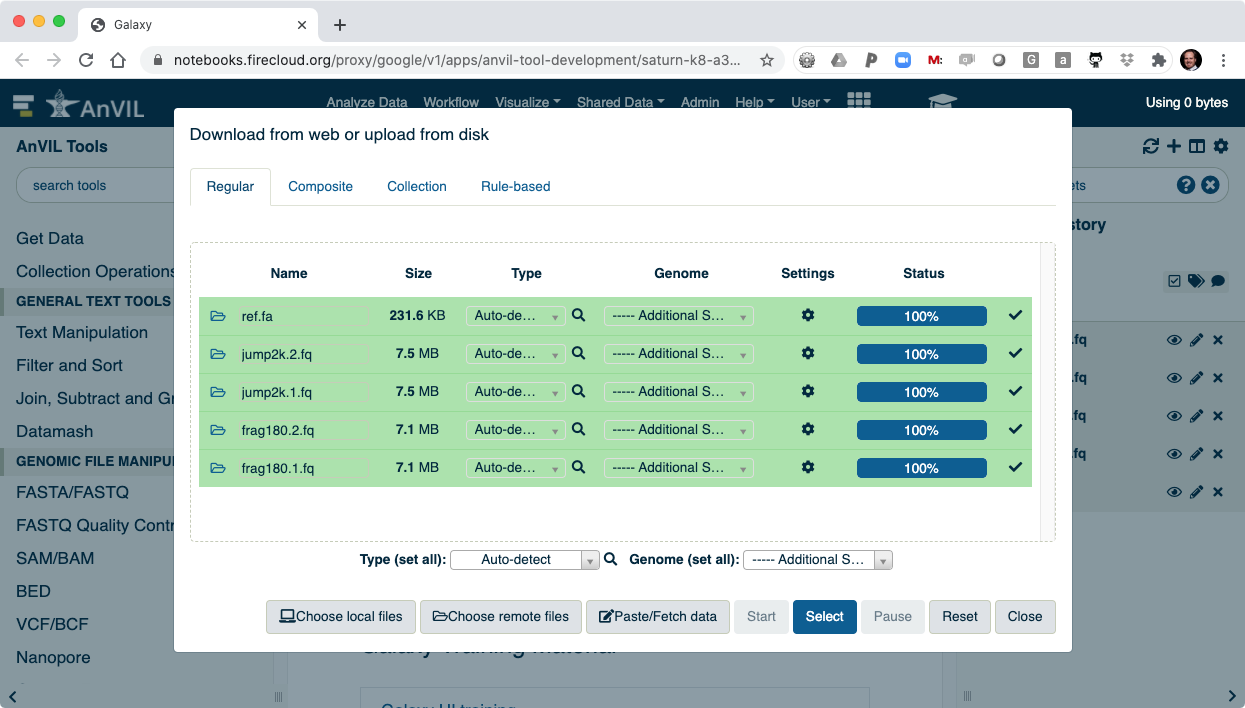
- You can then "Close" the data picker to see the main Galaxy interface.
III. Running Tools in Galaxy
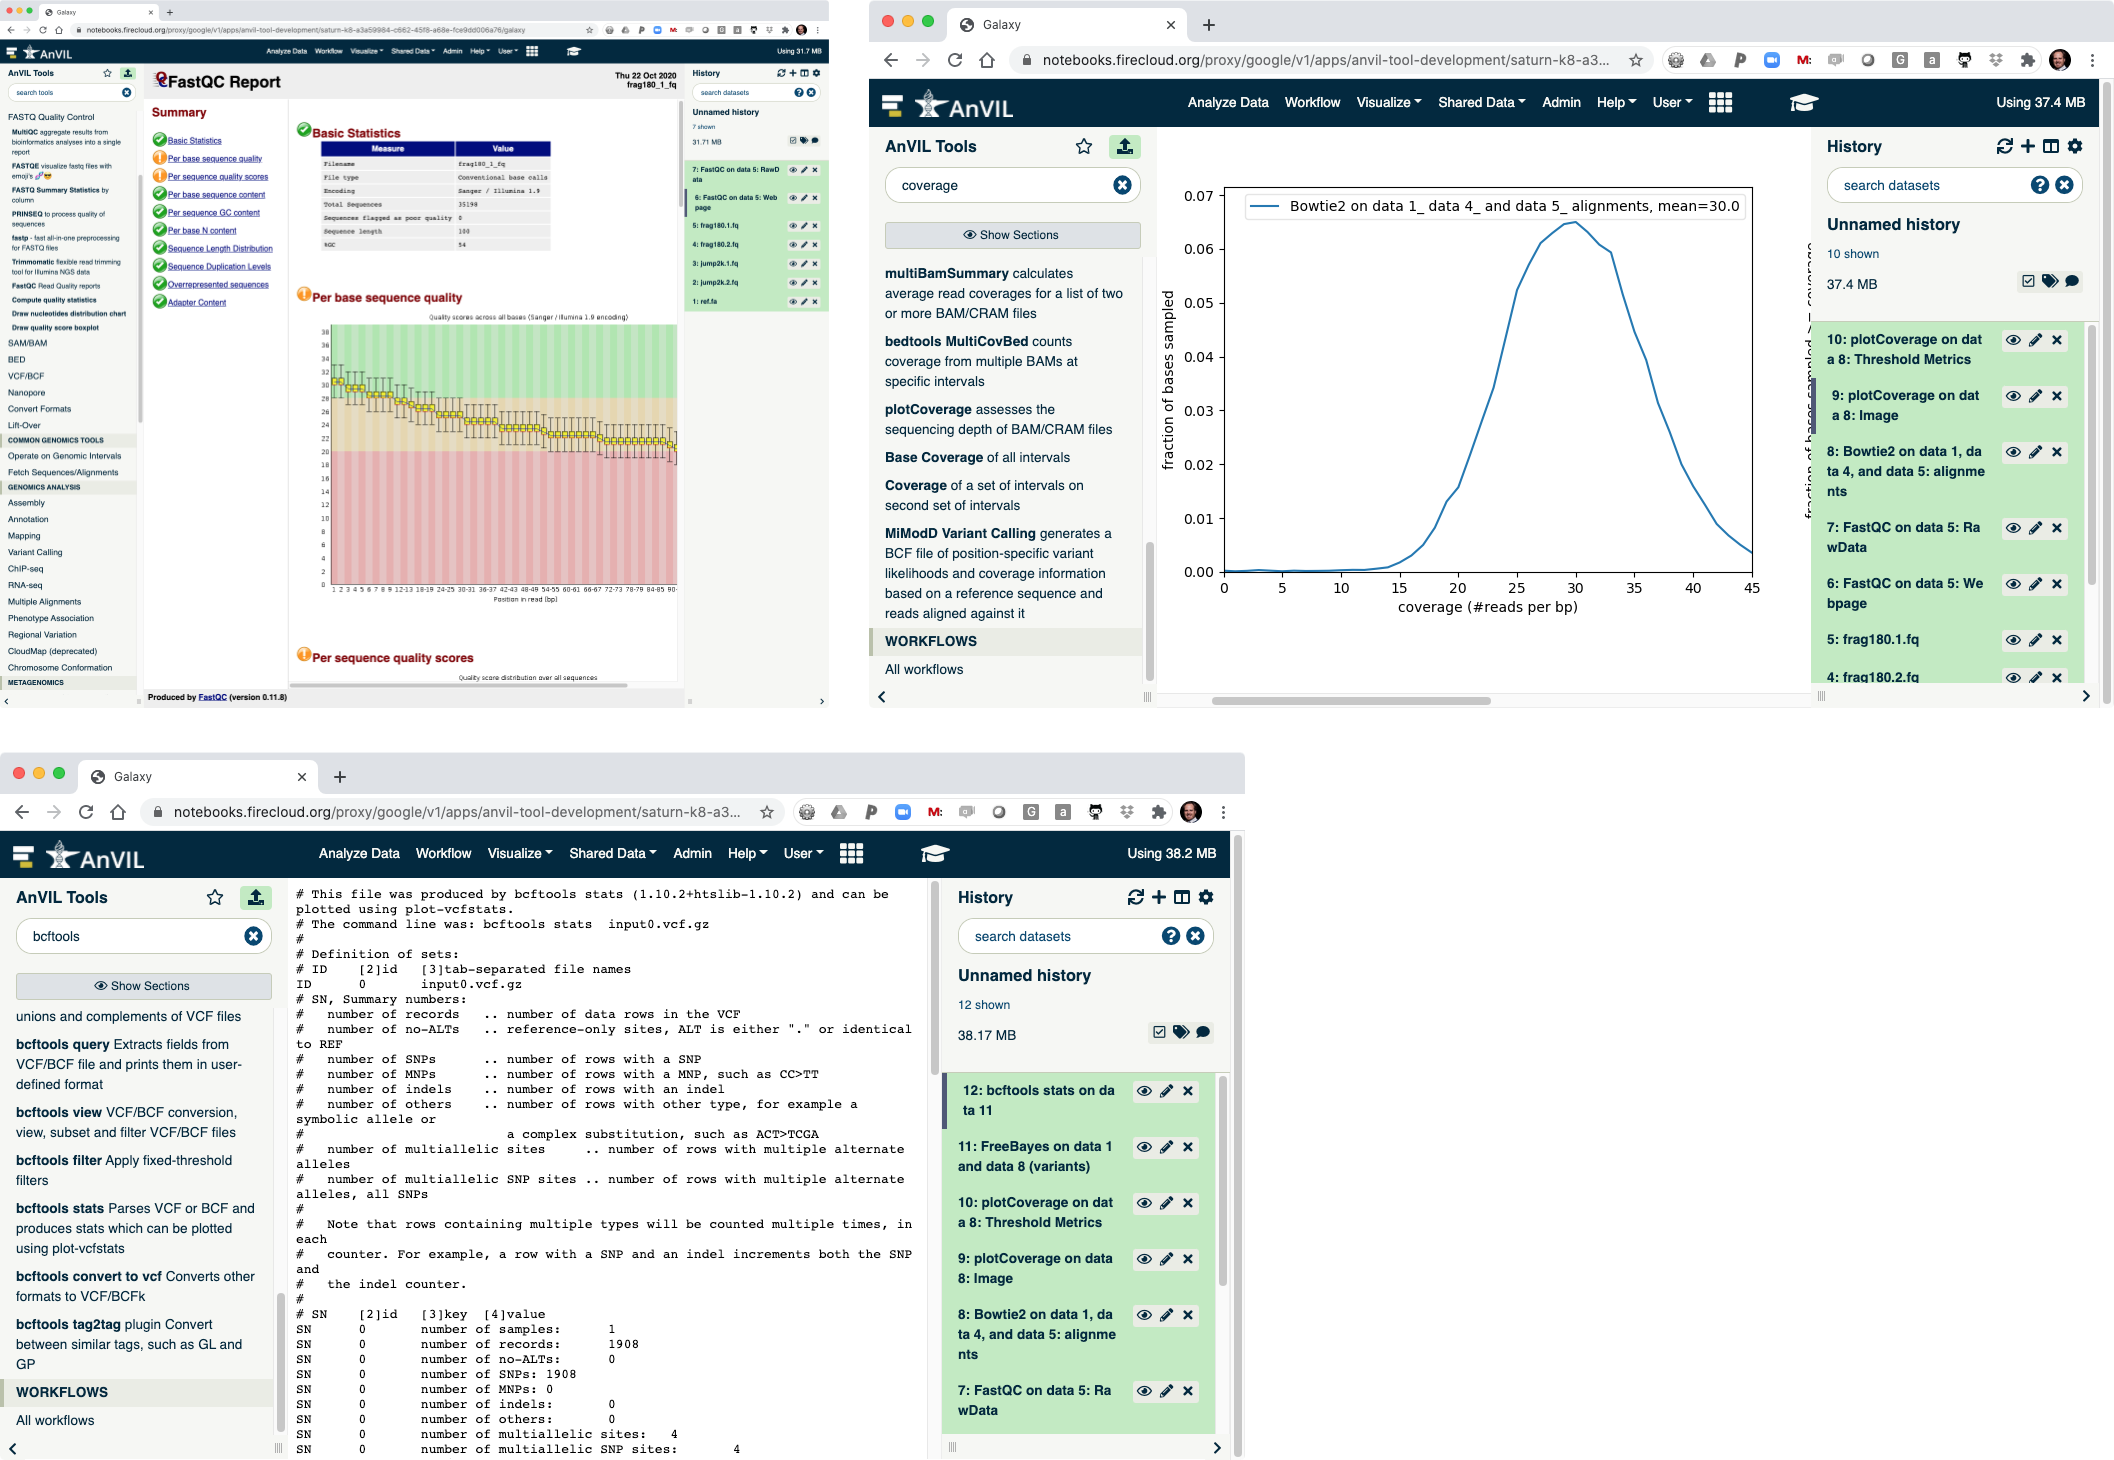
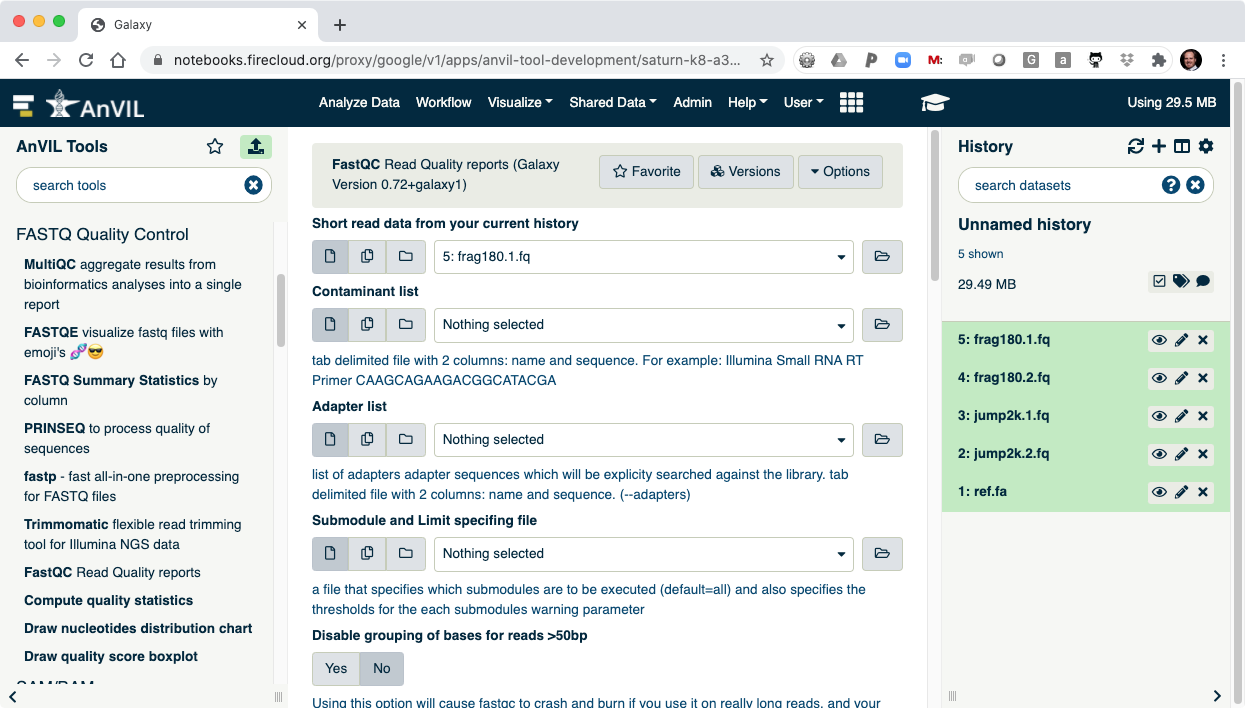
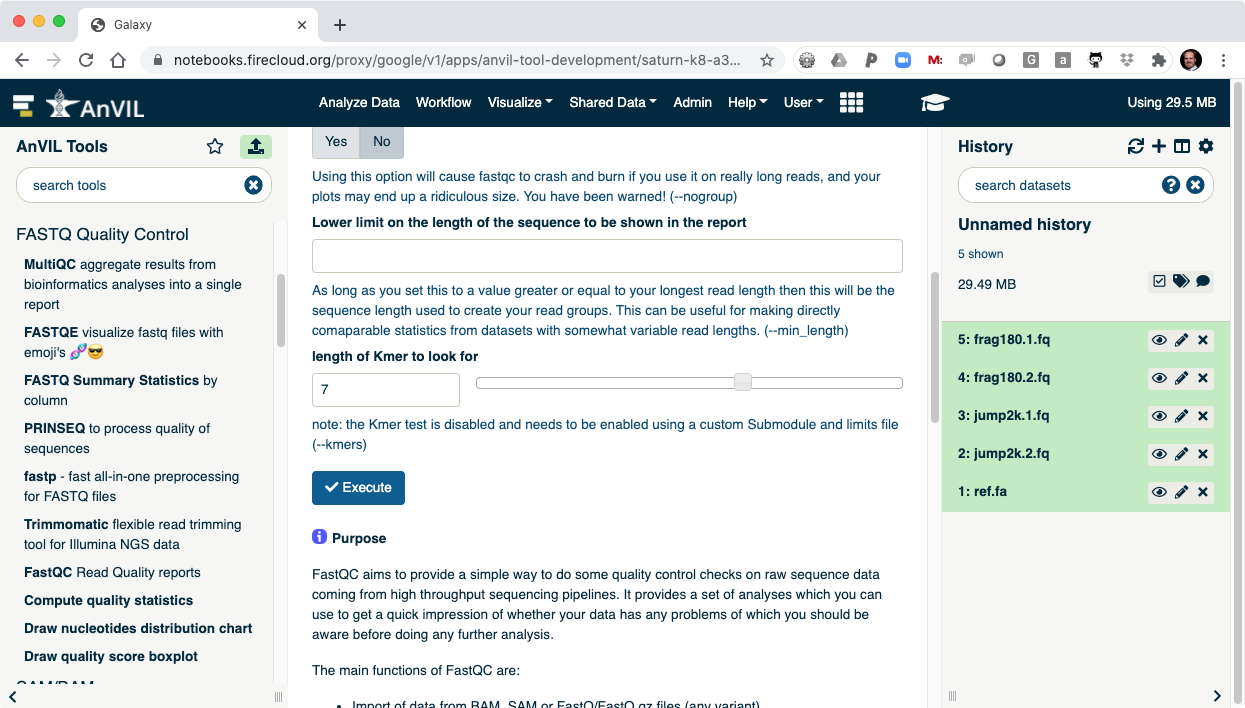
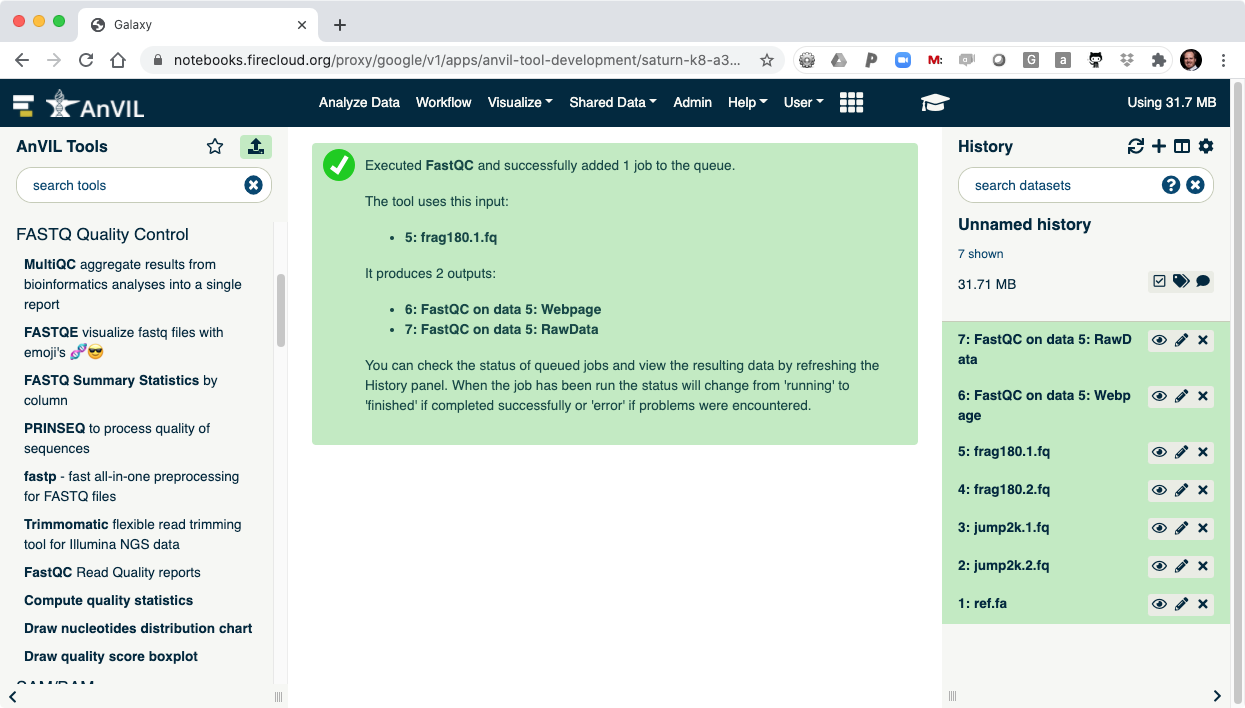
- On the left-hand tool panel, expand the "FASTQ Quality Control" menu and click on "FastQC". This will automatically pick the most recent item in your history (frag180.1.fq).
- Clicking "Execute" at the bottom of this panel will run the tool.
- As the Job is running, the task will be added to the history panel on the right.
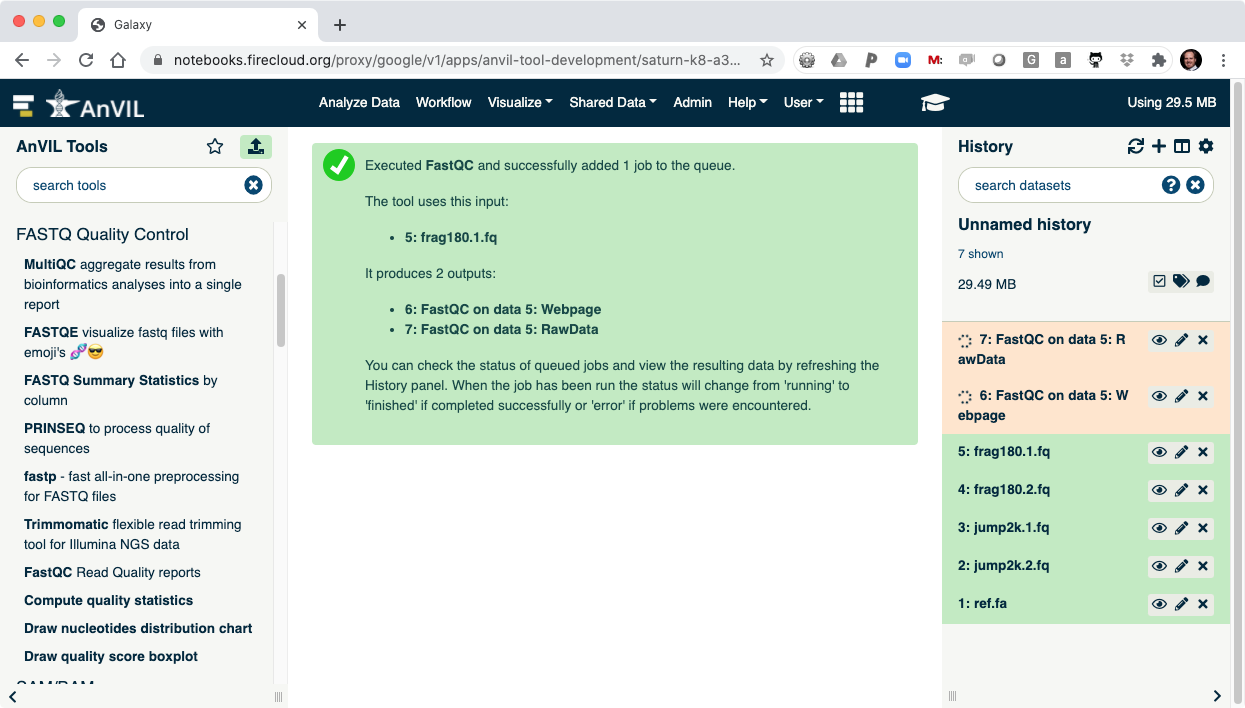
- Once the job is complete you will see the job turn green.
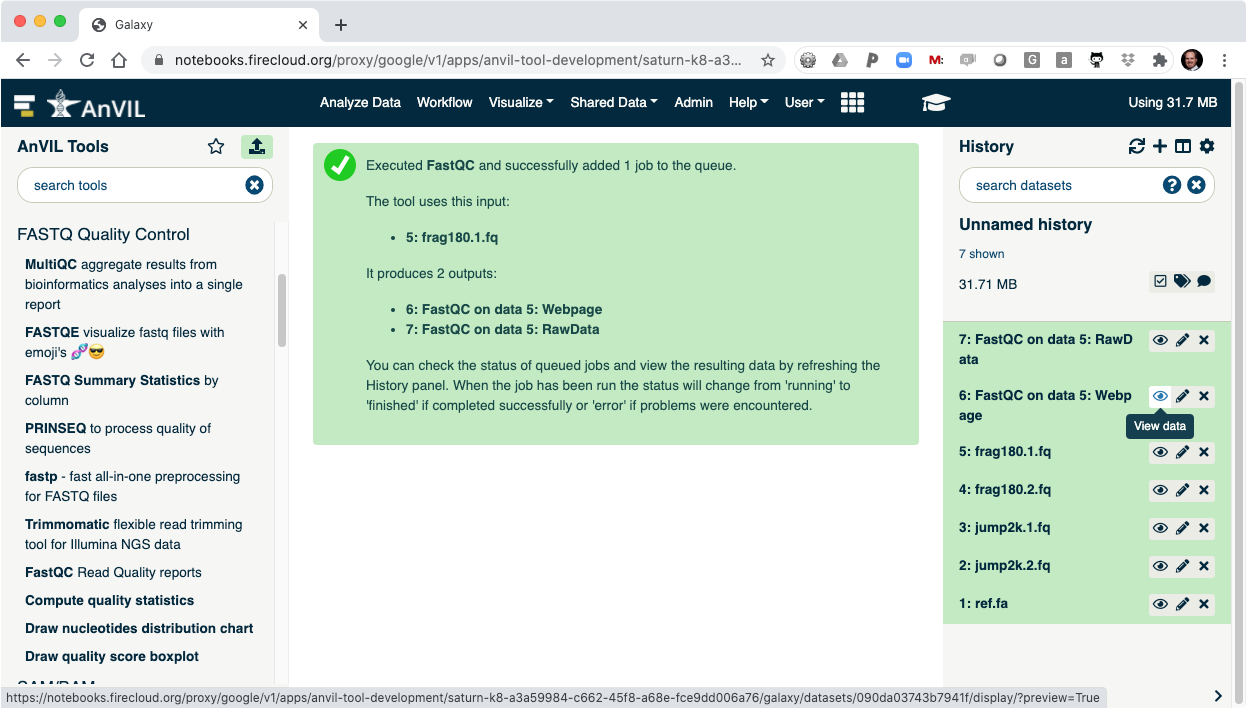
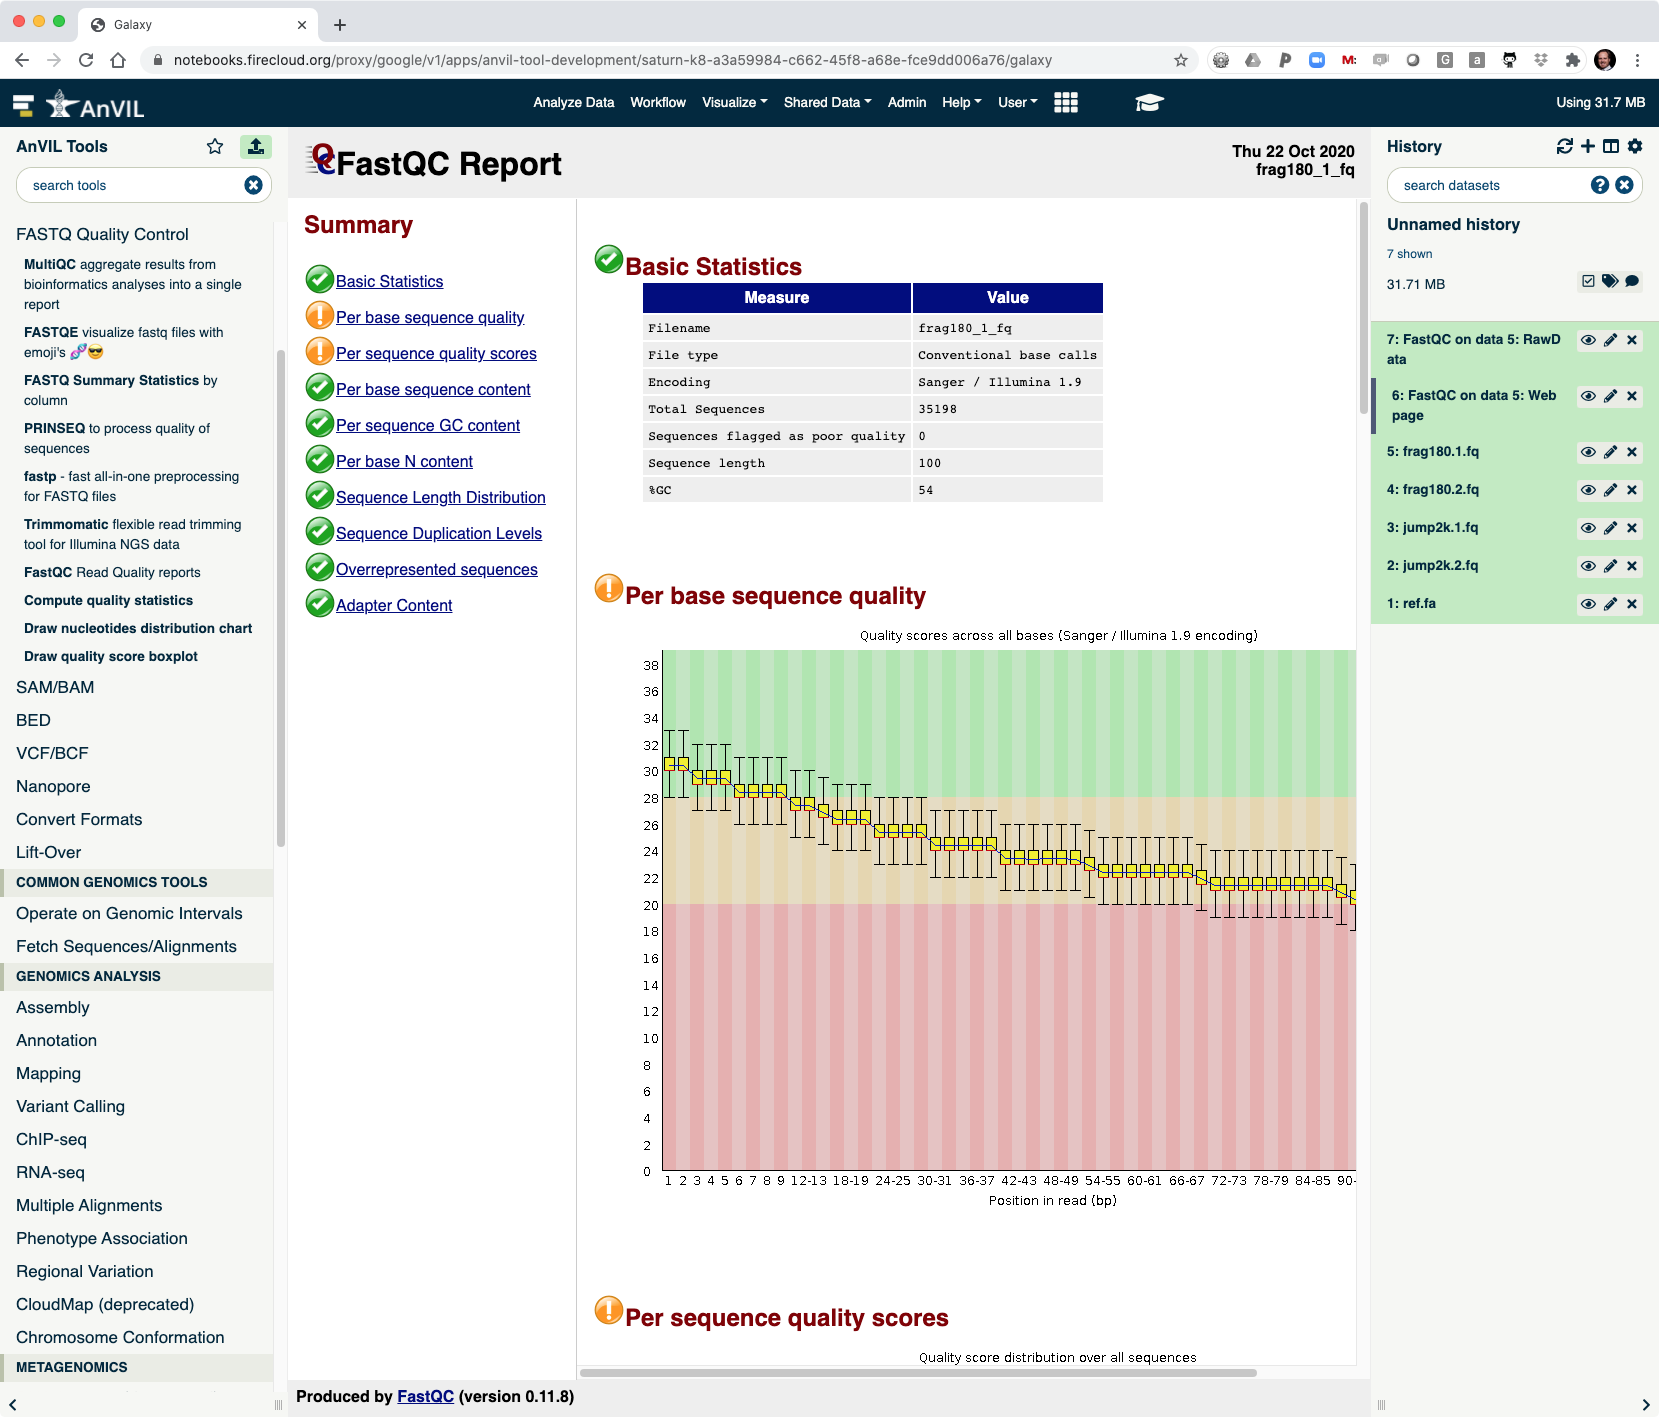
- Click the "Eye" view data tool to show the results.
- This shows the reads have overall good quality, with a decrease trend over the read length (as expected).
- Next align the reads with Bowtie2. Make sure to select paired-end reads, fastq #1 should be "frag180.1.fq" and fastq #2 should be "frag180.2.fq".
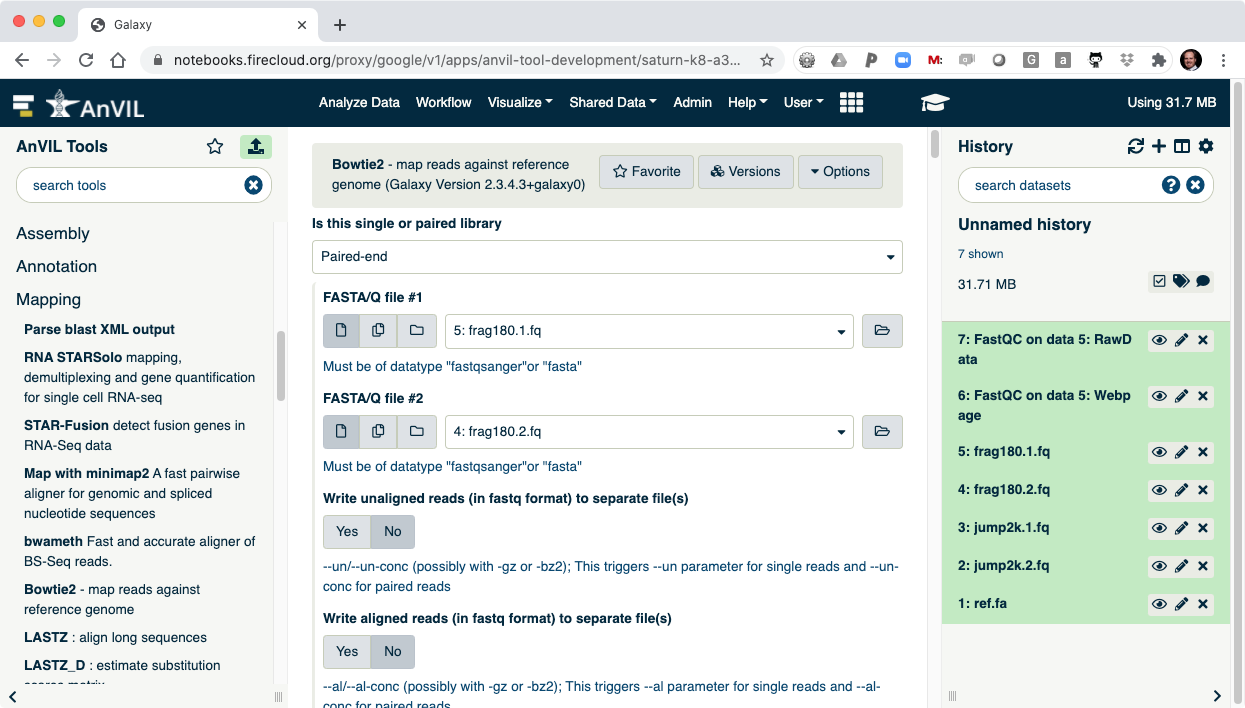
- Then pick "ref.fa" as your reference genome.
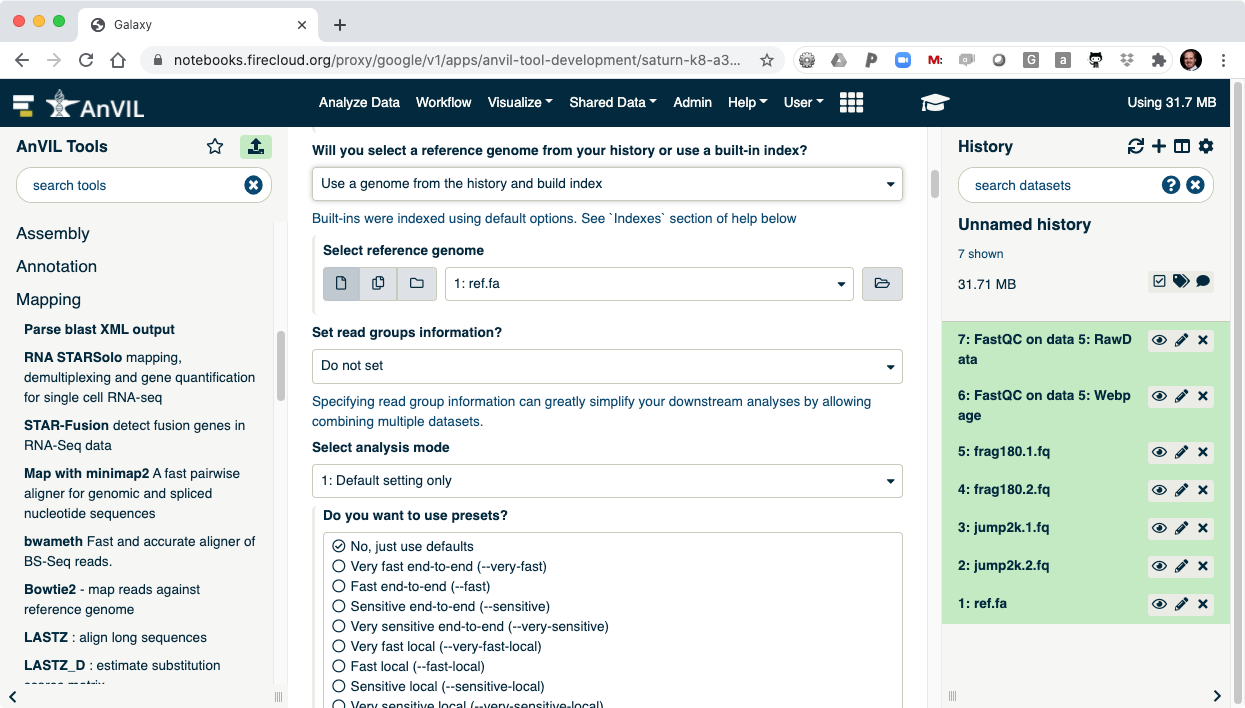
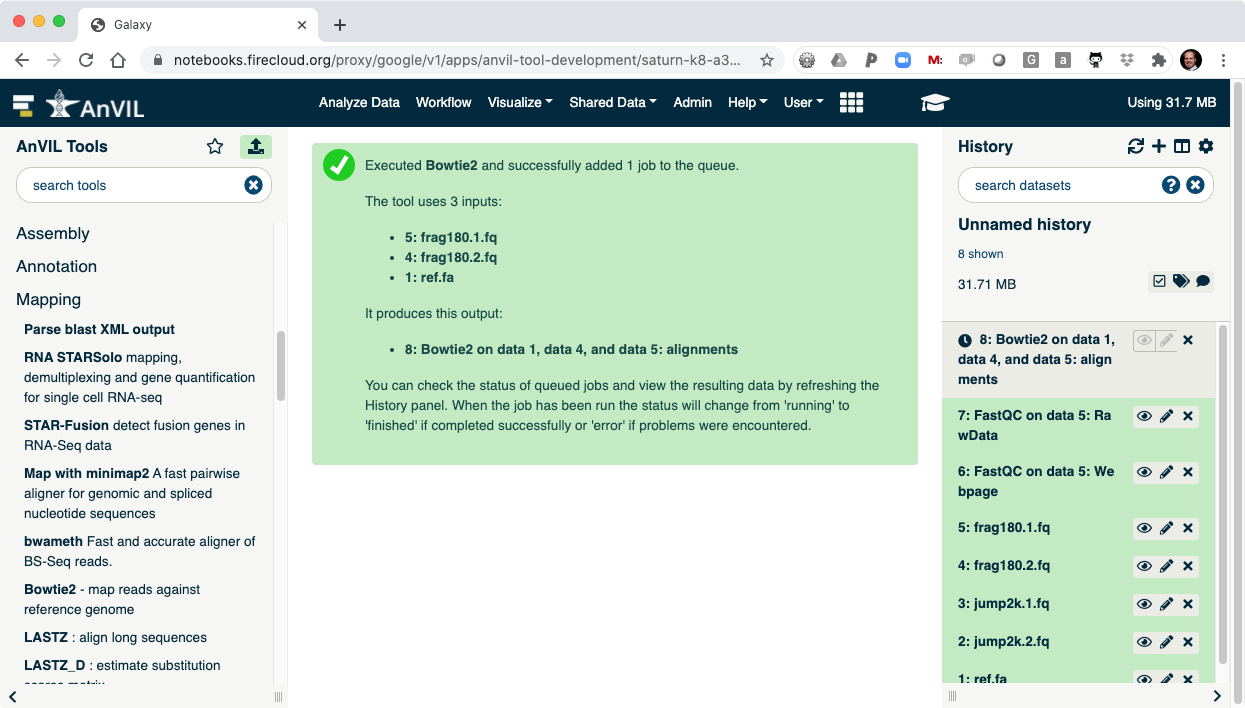
- Clicking "Execute" will show Bowtie2 launching.
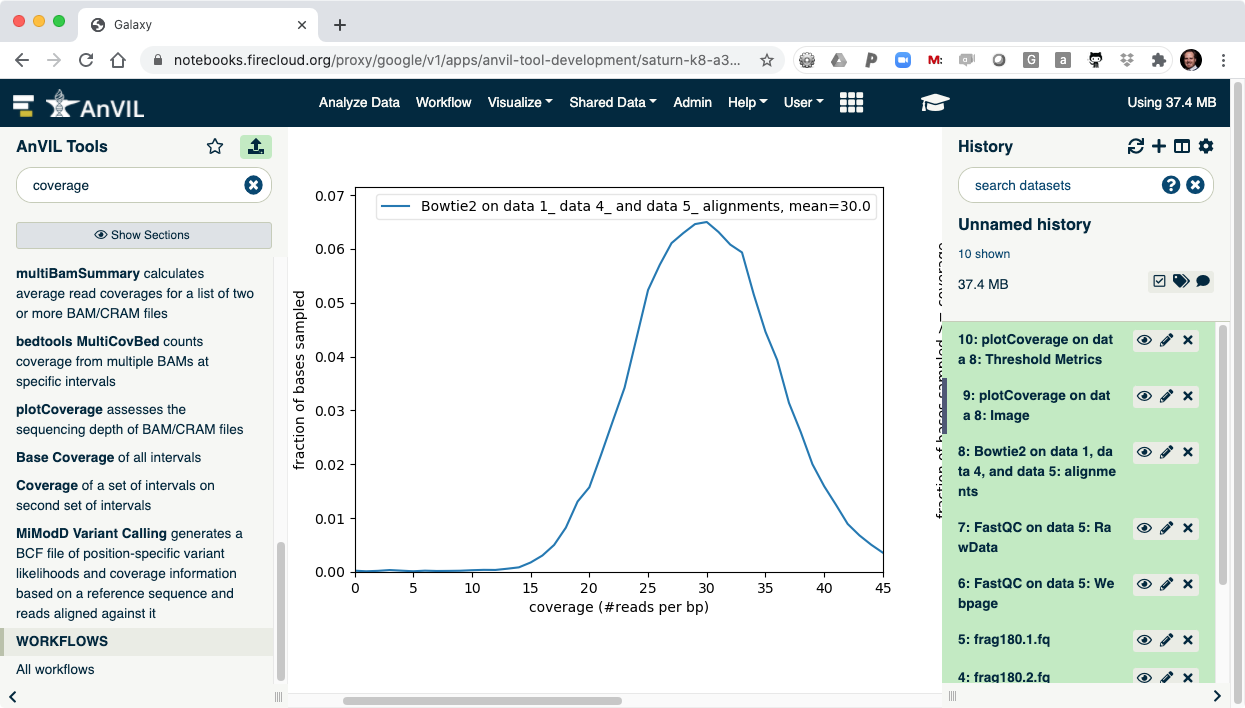
- Next use the plotCoverage tool to display the coverage histogram. Note the results from Bowtie2 will automatically be selected since that is the only compatible file format.
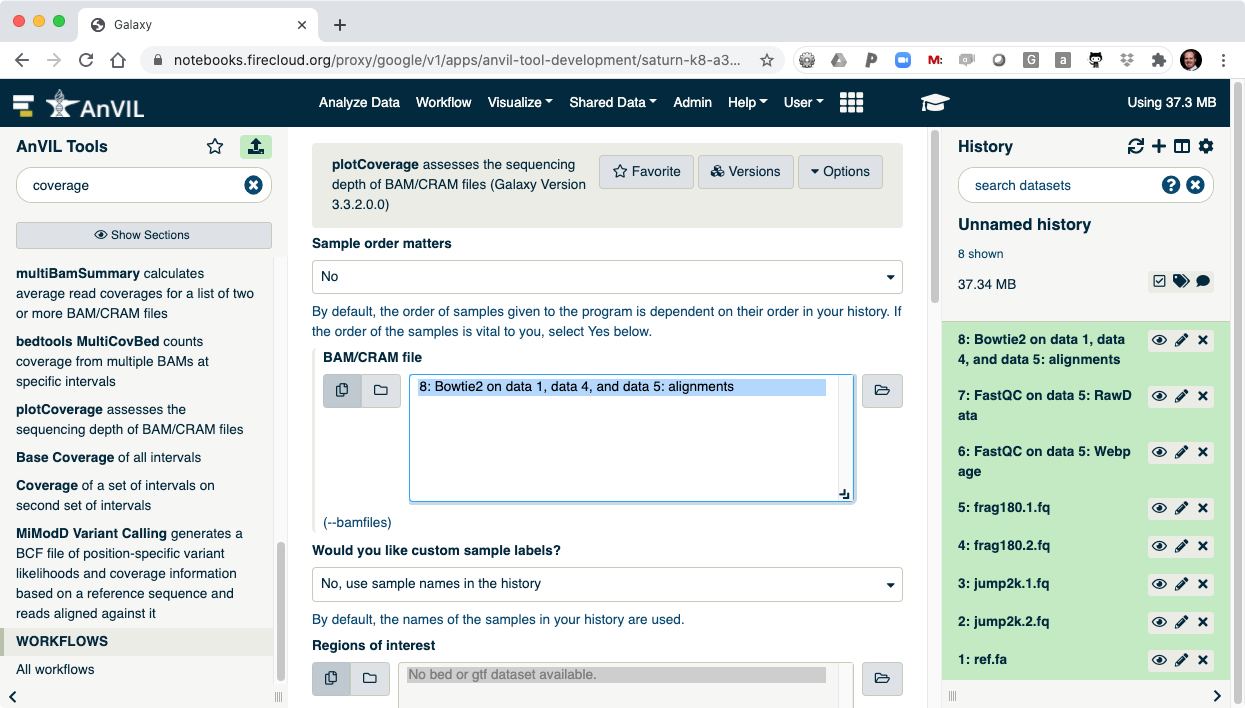
- Click "Execute" to show plotCoverage running.
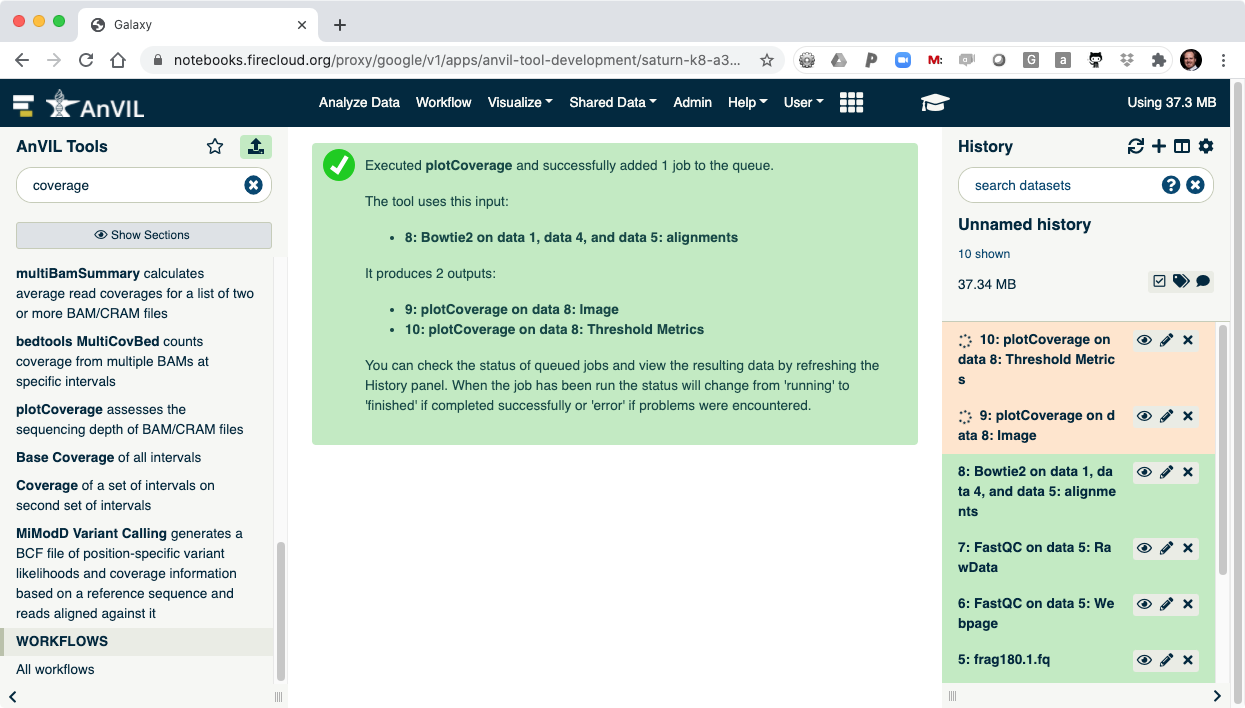
- Once complete, click the view data icon for the plotCoverage image (step 9) to show the coverage distribution.
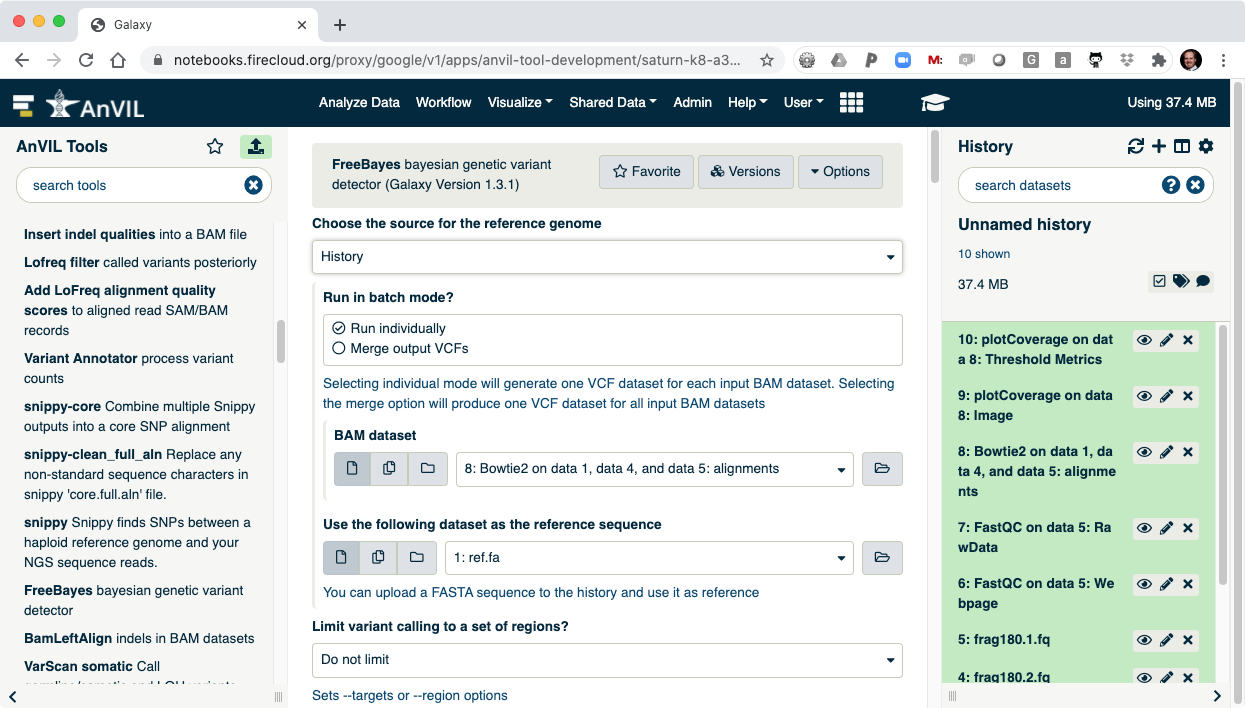
- Next run FreeBayes to call SNVs and indels in the sample. Make sure to select "History" as the source of the reference genome.
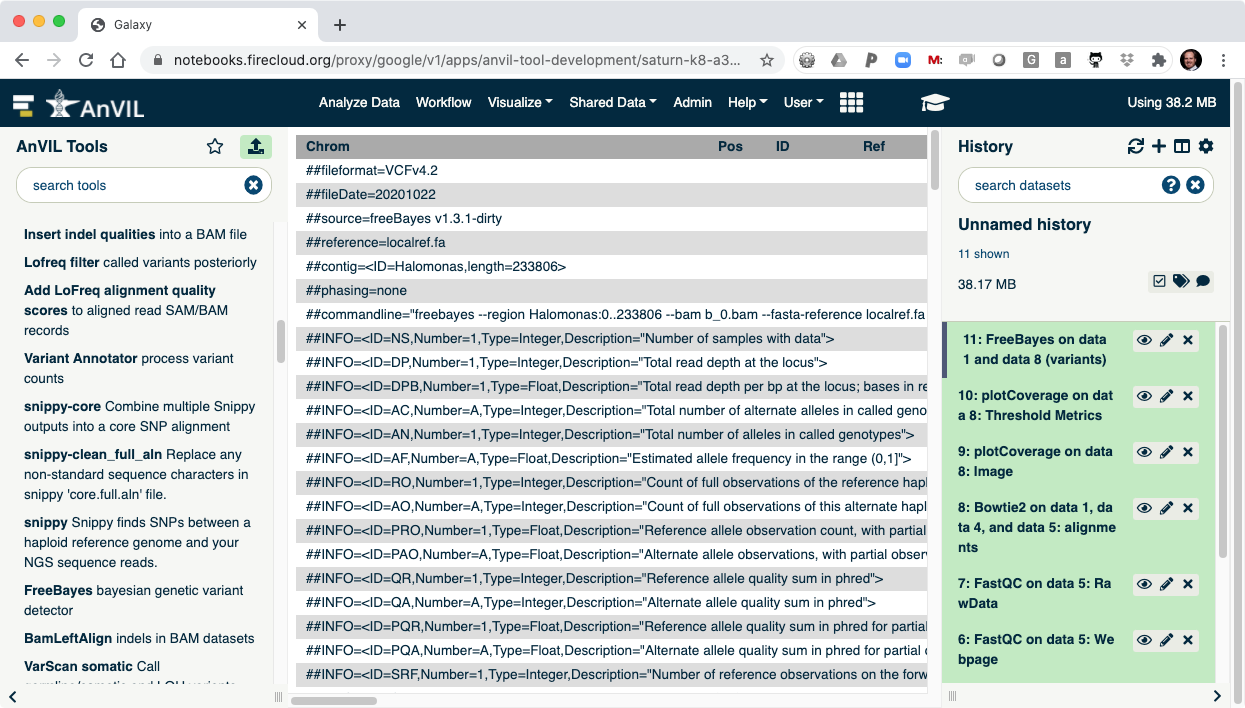
- Once FreeBayes is complete, you can click on the view data icon to display the VCF file containing the variants.
- The last step is to summarize the variant calls using "bcftools stats".
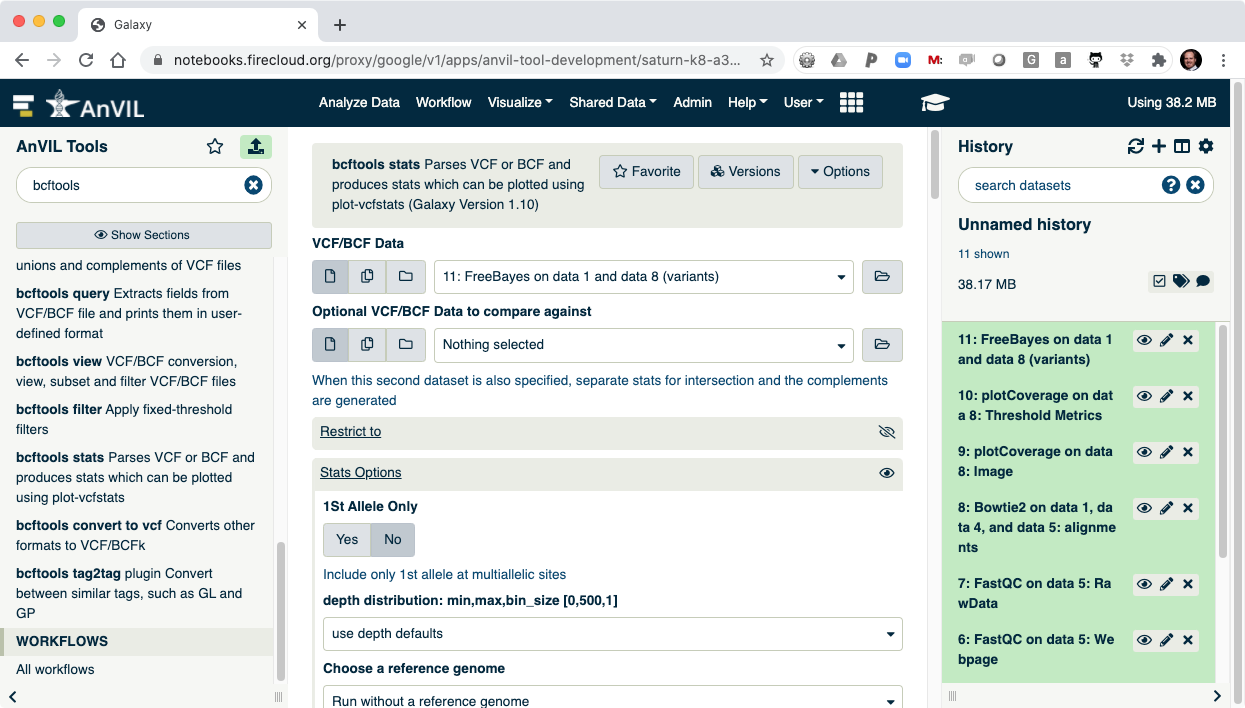
- Once this is complete, you can view the summary of the VCF file. You should see that there are 1908 SNVs in the sample.

IV. Shutting Down
- When you are done with Galaxy, you will need to stop your running instance of Galaxy to stop the charges. Return to the AnVIL workspace where you launched Galaxy.
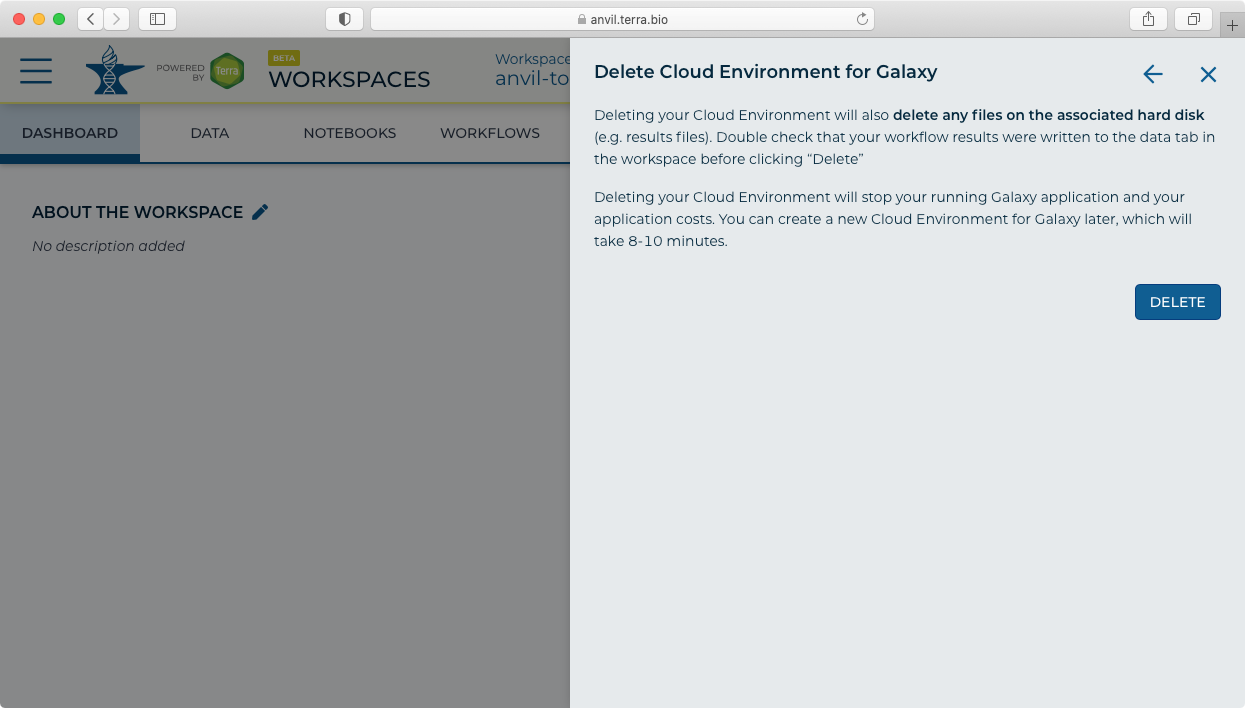
- Click "Galaxy Running" to display the administrative panel.
- Click "Delete" to stop and delete your Galaxy instance. Note this will delete all data and results files from your Galaxy session.
- After your running version of Galaxy is done, the "Galaxy Running" icon will disappear.
Help us make these docs great!
All AnVIL docs are open source. See something that’s wrong or unclear? Submit a pull request.
Make a contribution